Showing posts with label Indian recipes. vegetarian recipes. Show all posts

Tuesday, 10 April 2018

Boppasikaya avapettina kura (Green papaya subzi with mustard flavor)

Papaya is native to the tropics and easily available in the tropics of Americas, Central America, Mexico and is widely grown in India, Australia, the Philippines and Hawaii etc.

Ripe papaya is usually eaten raw after peeling the skin and removing the seeds. Papaya fruit is a significant source of vitamin C and folate. Papayas have a high amount of pectin.

In traditional medicine, it is believed that papaya can raise the platelet levels and so papaya is used as a medicine in Dengu fever. Papaya leaves are believed to be useful in treatment of malaria.

The unripe green fruit can be eaten cooked in many ways as subzis, salads and stews. Here is a recipe with mustard flavoring, which is very popular in
The unripe green fruit can be eaten cooked in many subzis and stews.


Ingredients:

  •      1 small green papaya (to get 2 cups of pieces)
  •      2 Tsp. tamarind paste or lemon juice
  •      1/4 Tsp. turmeric powder
  •      Salt to taste


Seasoning:

  •      3 Tsp. oil
  •      1 or 2 red chiles
  •      1 Tsp. chana dal
  •      1 Tsp. urad dal
  •      1 Tsp. mustard seeds
  •      Pinch of asafetida
  •      Curry leaves
  •      2 to 3 Tsp. mustard paste


Directions:

  1.      Wash and clean green papaya.
  2.      Peel the skin and remove any seeds (if they are there).
  3.      Boil water in a thick pan and add the papaya pieces.
  4.      Add turmeric.
  5.      Let the pieces cook for 5 to 10 minutes, till the pieces are soft to touch.
  6.      You may pressure cook them for two or three whistles.
  7.      Drain the pieces and discard the water.
  8.      Heat oil in a thick pan.
  9.      Add red chiles and cook for a minute.
  10.      Add chana dal, urad dal and mustard seeds.
  11.      Add asafetida.
  12.      When mustard seeds splutter, add curry leaves
  13.      Add the cooked papaya pieces.
  14.      Add tamarind paste.
  15.      Add salt and mix well.
  16.      Cook for 3 to 5 minutes.
  17.      Remove from heat.
  18.      Grind 2 Tsp. mustard seeds with water and a pinch of turmeric.
  19.      (If you want a short cut, you may add mustard powder available in stores.)
  20.      Add the mustard paste /powder to the subzi and mix well.
  21.      Transfer to a serving dish after 15 minutes.
  22.      Tastes very nice with rice.


Tuesday, 6 September 2016

Brussels sprouts with grated coconut subzi

Brussels sprouts is a cool season crop and very popular in Europe and USA. This vegetable was originally grown in Belgium and possibly that is why the name Brussels sprouts! Brussels sprouts resemble miniature cabbages. Unlike cabbage, they grow in bunches of 20 to 40 on the stem of a plant.

Brussels sprouts are low glycemic and nutritious vegetables. They are excellent sources of many vitamins like A, B complex and vitamin K which helps in preventing Alzheimer's disease. Lots of minerals like copper, calcium, potassium, iron, manganese and phosphorous are also available in the sprouts.

Thus, brussels sprouts are incredibly nutritious vegetables and they offer protection from many deficiencies and believed to protect from heart diseases and colon and prostate cancer.

In India, they are not seen in markets, but, in places like Delhi, you can buy them in super markets.
I tried making the subzi using what is available in Delhi, but, as the sprouts are not fresh and they also were not tender, the taste was not at all like the one I made with fresh sprouts in USA. I understand that in big metros, the sprouts are available in the market. So, unless you get really fresh ones in local markets, you do not try this subzi.


Ingredients:

  •      2 cups brussels sprouts, cut into halves or quarters
  •      3 to 4 Tbsp. grated coconut (fresh or dehydrated)
  •      1 red chile
  •      1 Tsp. chana dal
  •      1 Tsp. urad dal
  •      1/2 Tsp. mustard seeds
  •      1/2 Tsp. jeera seeds
  •      A few curry leaves
  •      2 Tsp. oil
  •      Salt to taste

Directions:

  1.      Wash and cut brussels sprouts into halves or quarters according to taste.
  2.      If the outside leaves are very tough, you may discard them. Otherwise, you may cook along with the outside leaves also.
  3.      Heat the pan and add oil.
  4.      When the oil is hot, add red chile.
  5.      After a minute add chana dal, urad dal, mustard seeds and jeera seeds.
  6.      When mustard seeds splutter, add curry leaves.
  7.      Add brussels sprouts and keep stirring.
  8.      Add a few spoons of water, (if necessary), cover and cook for 3 to 4 minutes.
  9.      Keep stirring in between.
  10.      Add grated coconut and let it cook for a few more minutes.
  11.      Keep stirring so that the vegetable is not burnt.
  12.      Turn off the heat.
  13.      Serve hot. Very tasty dish and can be served with rice or roti.
 

Thursday, 21 May 2015

Chinta chiguru pappu (Tender tamarind leaves in dal)

Chinta chiguru, tender tamarind leaves is available in South India during early spring. As the name suggests, tender leaves from tamarind tree are sold in Andhra Pradesh and other South Indian states. The leaves have a subtle tart flavor without being overly sour. They increase the nutrient value of the dish and add a nice tangy taste to it. Quite a few dishes are made with the leaves like chinta chiguru chutney, chinta chiguru pulao etc.

The leaves are a good source of vitamin C. As any seasonal vegetable, use of the leaves is recommended by nutritionists.

I found some bottled leaves in the Indian stores in USA. If you look around, you may be able to find the leaves in some Asian stores.


Part of a tamarind tree:


Tender leaves with stems:                                                         Stems removed from leaves:


Cooked dal:


Leaves being cooked along with seasoning:


Ingredients:s

  •      1 cup chinta chiguru (Tamarind leaves)
  •      1 cup cooked moong dal
  •      Salt to  taste
  •      1/4 Tsp. turmeric powder
  •      2 or 3 green chiles
  •      A few curry leaves

Seasoning:

  •      2 Tbsp. oil
  •      2 Red chiles
  •      1/2 Tsp. urad dal
  •      1/2 Tsp. mustard seeds
  •      1/2 tsp. jeera seeds
  •      A pinch hing (Asafetida)
  •      A few garlic pods

Directions:

  1.      Place chinta chiguru in a large plate and take the leaves along with stems between the palms and rub well.
  2.      Leaves are thus separated from the stems. Stems do not taste good and also are troublesome while eating!! 
  3.      Remove the stems and collect the tender leaves.
  4.      Wash the leaves and set them aside.
  5.      Peel garlic pods.
  6.      Cook moong dal (either with skin or without) in a pressure cooker.
  7.      In a deep thick pot, heat oil.
  8.      Add red chile and urad dal.
  9.      After a minute, add mustard seeds and jeera seeds.
  10.      When mustard seeds splutter, add hing.
  11.      Add half cup of water.
  12.      Add chinta chiguru and green chile.
  13.      Cook for 3 to 4 minutes.
  14.      Add cooked dal.
  15.      Add salt, turmeric powder and cook for about 10 minutes.
  16.      Keep stirring.
  17.      Add curry leaves and remove from heat.
  18.      Heat oil in a small pan, add garlic pods and fry.
  19.      When garlic pods are golden in color, add to the cooked dal.
  20.      Transfer to a serving bowl and serve.

Any other dal like toor dal or masoor dal also can be used.
Chinta chiguru dal can be served along with rice or roti.


.


Wednesday, 15 April 2015

Thoorpu avakaya ( dried avakaya using yellow chile powder) Introduction

Pickles have some local variations, where ingredients locally available are used. Also, depending on the weather conditions, procedures are modified.
In east coastal Andhra Pradesh, from east Godavari district to Srikakulam district, yellow chilis, known as Gollaprolu mirchi are available. This variety of chilis are hotter than the red variety. Also very fine mustard seeds called Madugula avalu are used for making pickles in this region. The proportions of chili, mustard and salt are quite different from the usual red variety.
As this area is east coastal Andhra Pradesh, the pickles made here are called Thoorpu (eastern) avakayalu. Humidity in this region is much more than the rest of Andhra Pradesh. This affects the shelf life of pickles made. Probably this is the reason why this variety of pickles are kept in direct  sun and dehydrated for 6 to 9 days before they are kept away in the jar. 

Chilis and mustard seeds used are available only in coastal Andhra Pradesh. So, I normally get my supply of both from Rajahmundry.

I tried to get some information and photographs about the chilis and mustard from google, but could not get any. I had to request my niece to send me pictures of chilis and mustard from Vizianagaram, which is situated in north coastal Andhra Pradesh!!

Yellow chilis (Gollaprolu mirchi):


Fine mustard seeds (Madugula avalu):


Monday, 15 September 2014

Kurala avakaya (Mixed vegetable avakaya)

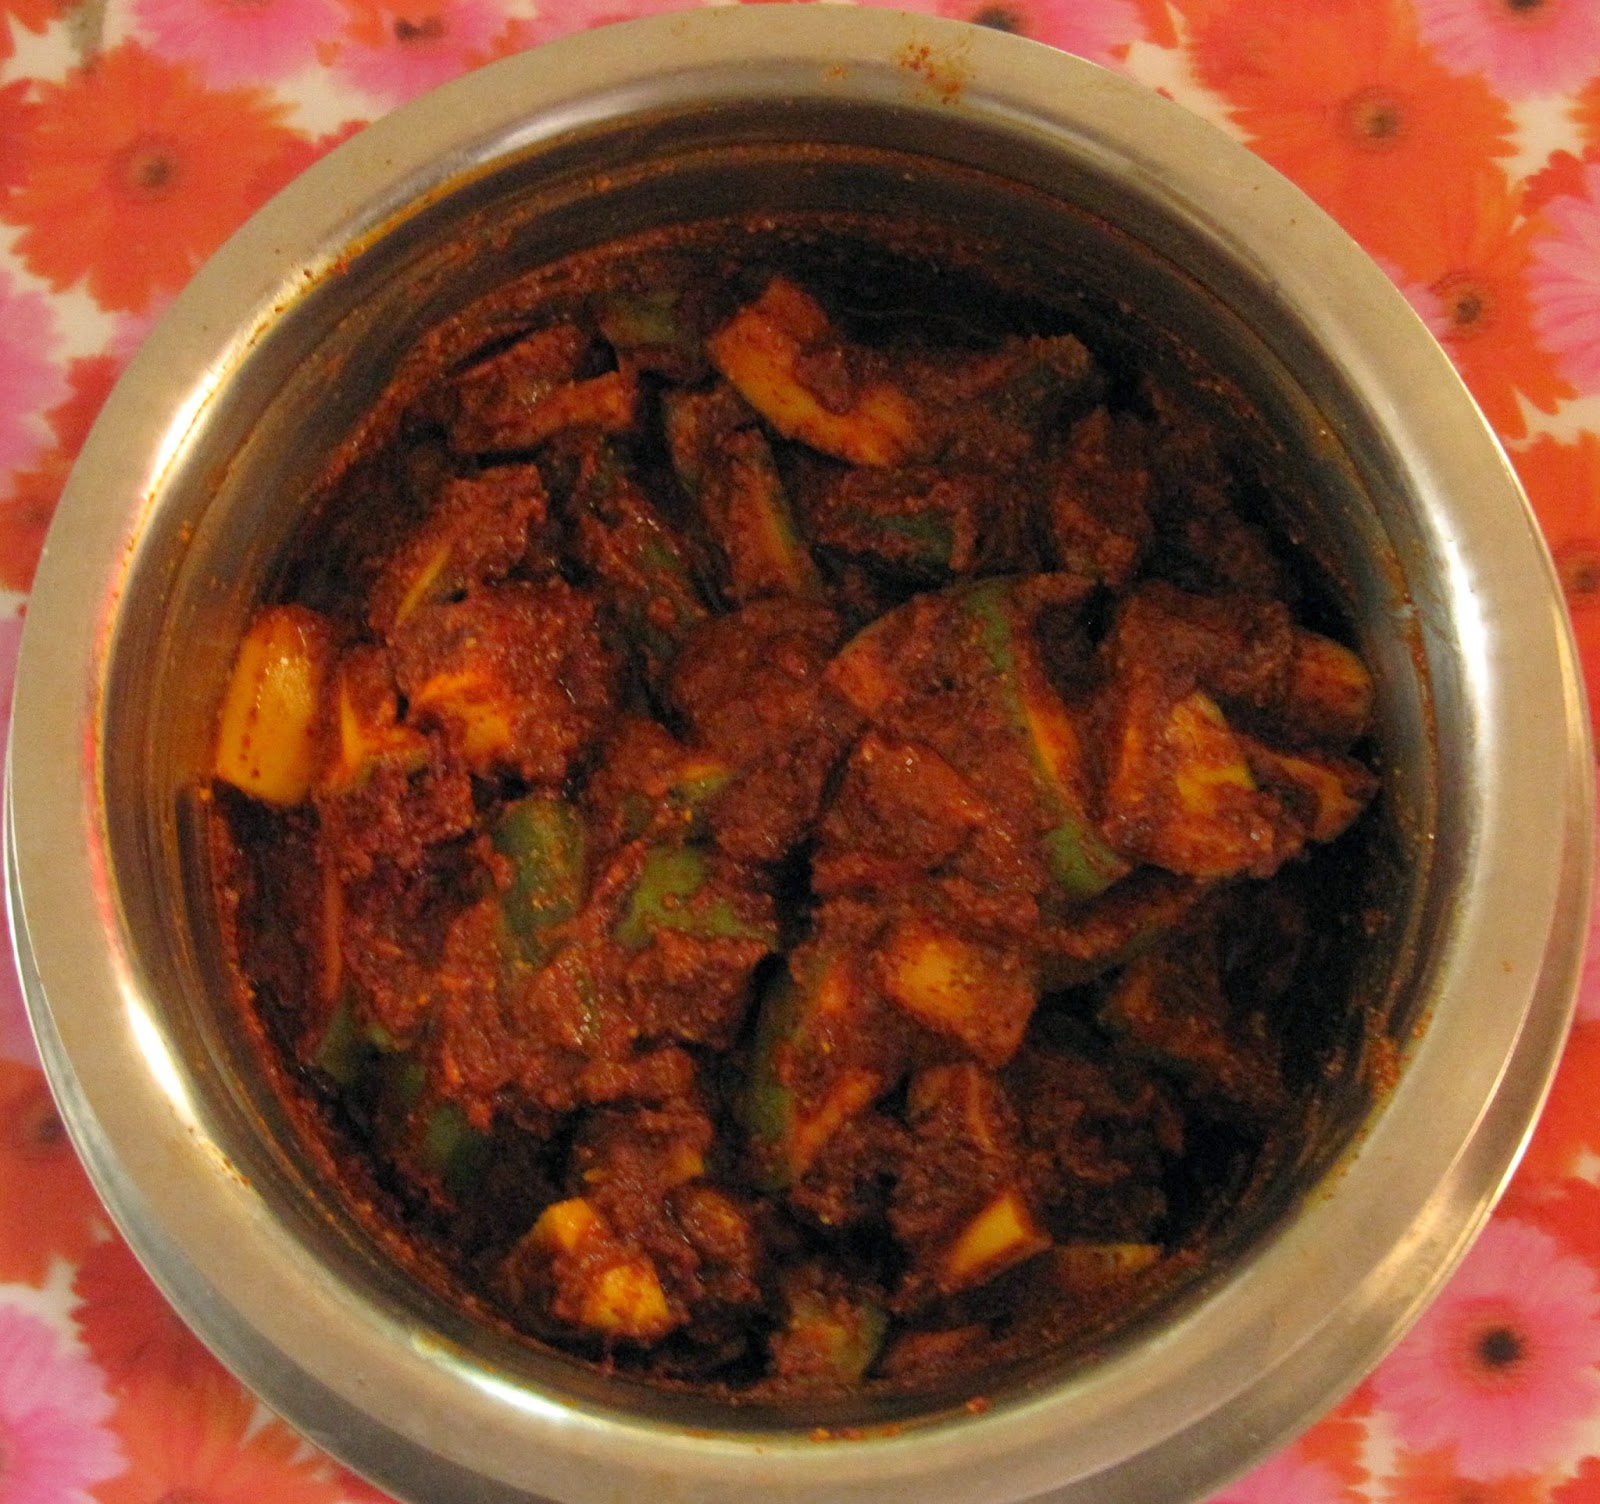
This is a temporary pickle. It is a very popular pickle in our families. The recipe came down from my grandmother through my mother etc. Unlike the other mixed vegetable pickles where vinegar is used, here the ingredients are chili powder, mustard powder and salt which are used in our regular pickles. The vegetables mentioned below are used. Approximately the vegetable pieces are equal to the amount of mango pieces used. If refrigerated, the pickle stays for more than 2 or 3 months.
If the mango is not sour enough, you may add some citric acid. I have made the pickle in USA, adding rhubarb which is very sour and you do not need to add citric acid .
 
You can add green apple pieces also.
The vegetable pieces, specially bitter gourd taste very nice after they are soaked for a few days.


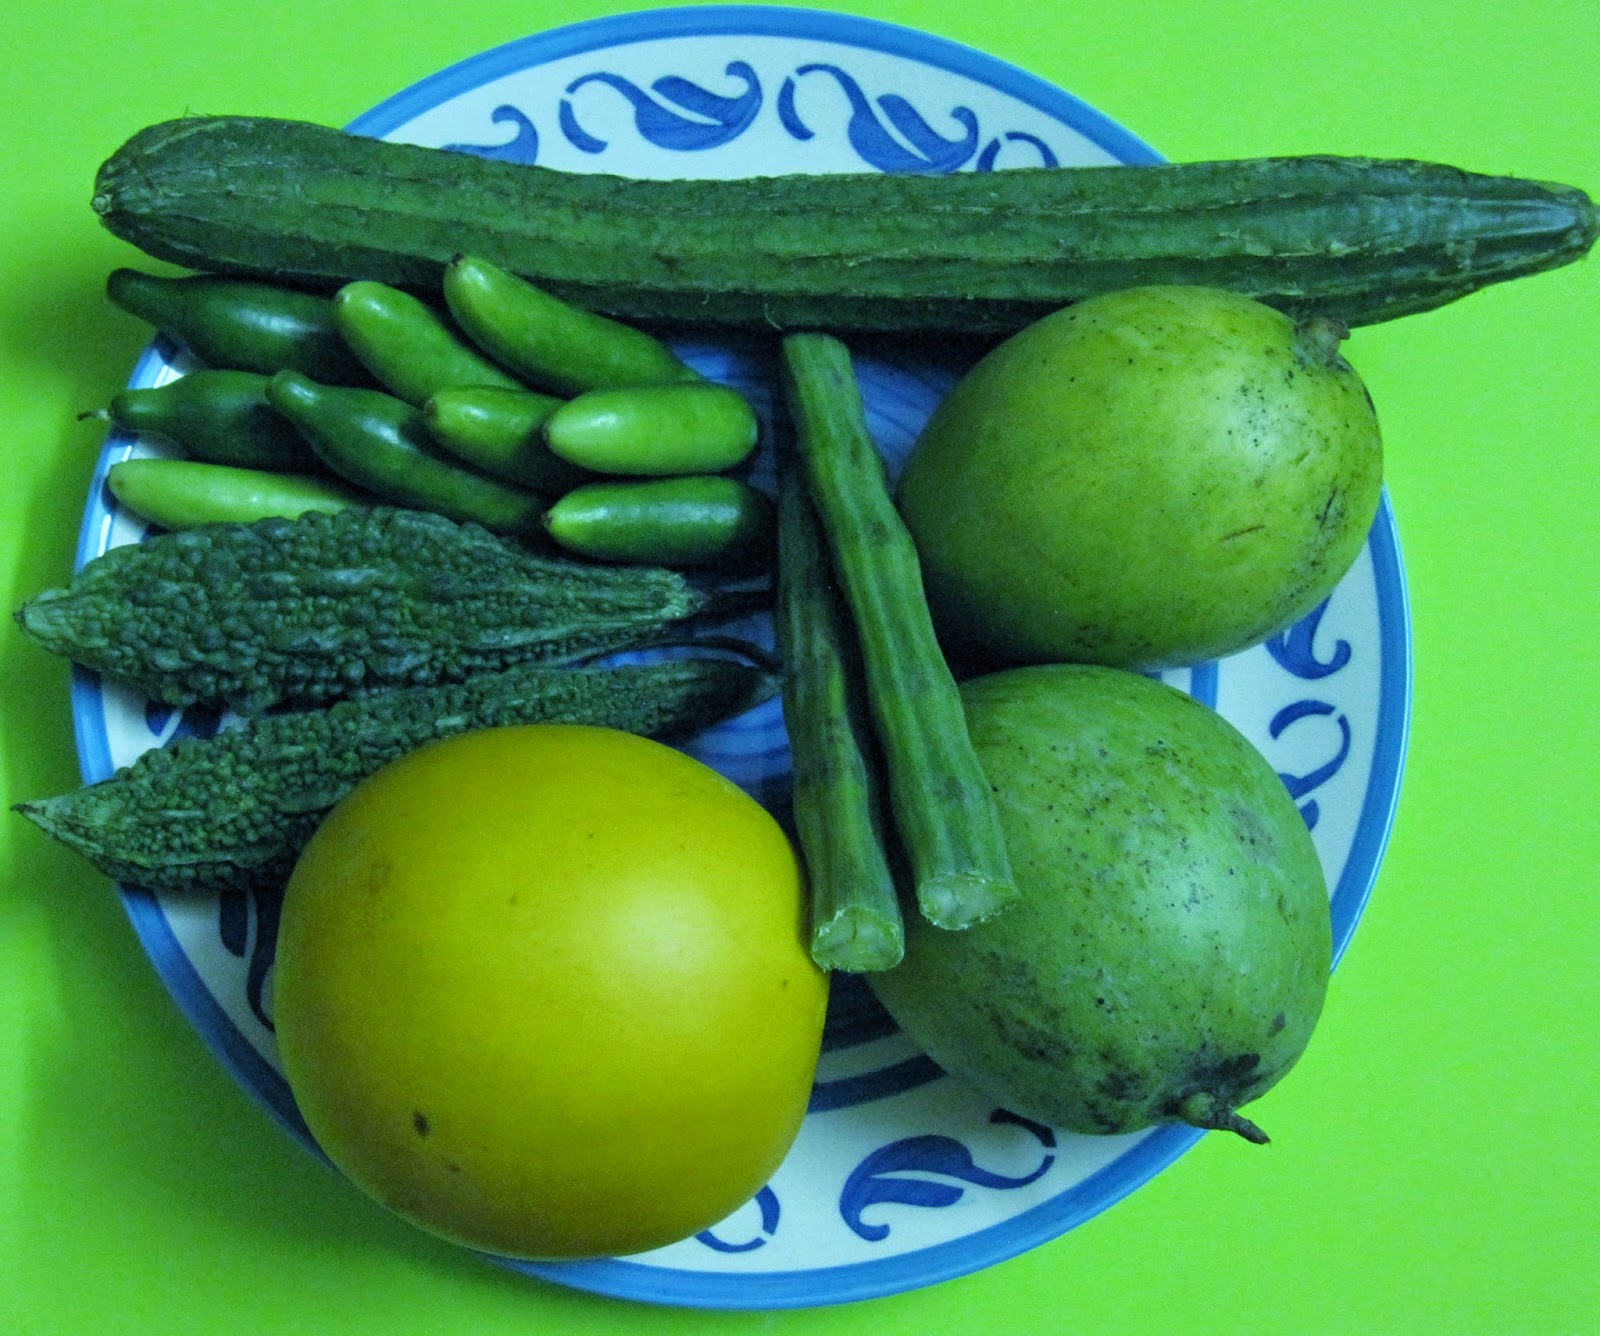
Vegetables used in kurala avakaya:


Vegetables cut into pieces:


Chili powder mixture added to the cut pieces:


Cut pieces and powders mixed well:


Ingredients:

All the following vegetable pieces to make upto 2 cups (equal to measure of mango pieces)
  •      2 cups mango pieces and
  •      Dosa kaya
  •      Beera kaya (Ridge gourd)
  •      Kakara kaya (Bitter gourd)
  •      Mulakkada (Drum sticks)
  •      Rhubarb (available in USA)
  •      2 tsp turmeric powder
  •      1 and 1/2 cups chili powder
  •      1 and 1/2 cups salt
  •      2 cups mustard powder
  •      1 cup oil
Seasoning:
  •      5 or 6 red chilis
  •      2 tbsp. chana dal
  •      2 tbsp. urad dal
  •      2 tbsp. mustard seeds
  •      1tsp  Hing (Asafetida)
  •      A few curry leaves

Directions:

  1.      Wash and dry all the vegetables.
  2.      Cut the mango with the peel and avoid cutting the seed portion.
  3.      Cut the vegetables along with peel into 1/2 inch wide and 1 and 1/2 inch long pieces. Remove seeds from dosa kaya.
  4.      For 2 cups of mango pieces, about 2 cups of all the other vegetables are needed.
  5.      Mix chili powder, mustard powder, salt and turmeric powder together in a large plate.
  6.      Add the vegetable pieces and mix well.
  7.      Add a few table spoons of oil and leave the mixture in a jar.
  8.      On the second day, mix it well from the bottom.
  9.      Heat oil in a pan and add chilis, dals and mustard seeds.
  10.      When mustard seeds crackle, add hing and curry leaves.
  11.      Pour the seasoning over the pickle mixture.
  12.      After an hour or so, mix the pickle well from the bottom.
  13.      Transfer the pickle to a clean dry jar.


Thoorpu avakaya plain

As mentioned this variety of pickles are very popular in coastal Andhra Pradesh. Proportions of ingredients are different from those of regular avakaya.

My mother and grandmother's generations, they used to cut the mangoes, so that they are not fully cut, but are joined at one end. The soft portion of the seed is fully scooped out and the chili mixture is stuffed in its place. Then the whole procedure of soaking, drying etc is followed. The pieces are separated whenever they are served. All the children are given the job of cleaning, scooping out the seed portion etc. So, the pickle making used to involve everybody in the family. No wonder, pickle making is a ritual!!
 
 
All the precautions mentioned in pickle making - introduction apply for these pickles also.

Thoorpu avakaya about one month after it was made:


Mixture of yellow chili powder, fine mustard powder and salt:


Mango pieces mixed with chili mixture:


Ingredients:

  •      10 medium sized mangoes or 4  to 5 cups mango pieces
  •      1 cup chili powder
  •      1 and 1/2 cups salt
  •      2 and 1/2 cups mustard powder
  •      2 to 3 cups oil
  •      2 tbsp. turmeric powder
  •      1/4 cup methi seeds (fenugreek)
 
Directions:

  1.      Wash and dry the mangoes.
  2.      Cut them into 1 and 1/2 inch large pieces.
  3.      Remove the seed portion and remove the thin film sticking to the kernel.
  4.      Mix all the powders together.
  5.      Add some oil and mix the powder well.

      Unlike for red avakaya, 2 and 1/2 containers of mango pieces are added to one container full of chili mixture.

  1.      Add the mango pieces to the chili mixture and place the mixture in a jar.
  2.      Cover and keep it in a cool dry place for 2 days.
  3.      Next day, there will be a lot of juice. Mix it from the bottom using a dry long spoon or using your hand.
  4.      On the third day, mix it well.
  5.      Squeeze the pieces to remove as much of the juice as possible.
  6.      Place all the pieces on a plastic sheet or steel plate and dry it directly in the sun.
  7.      Dry the juice also in the sun.
  8.      If the pickle is made in India, 2 or 3 days of sun drying is enough.
  9.      After the pieces are dried enough, they have to be placed back in the juice.
  10.      Mix it thoroughly and top it with some more oil.
Sometimes the juice is not enough after drying and the pickle tends to be dry and salty over time.
To overcome this, additional juice is added. Often, if magaya has more juice, some juice from magaya is added to this pickle. Otherwise, some mango pieces or grated mango is soaked in salt for 2 days and the juice from that is dried and added to this pickle. I added extra juice to the pickle I made (photo displayed).

Variation:

Thoorpu vulli avakaya -- Thoorpu avakaya with garlic

2 cups peeled garlic
Add the garlic to the chili mixture and follow the directions to make plain pickle.
Otherwise, add the peeled garlic to the pickle made and let it keep for about 10 days.

Garlic tastes very nice after it is soaked.

Shelf life for these pickles is for more than one year.


Avapacchadi (pulihora avakaya, mukkala pacchadi)

Ava pacchadi derives its name from the predominant ingredient "avalu" (mustard). It is also called "pulihora avakaya or mukkala pacchadi" as the pulihora seasoning is used in making this pickle. Many of my American friends like this pickle and comment that they are reminded of "wasabi" flavor!!

In Avakaya, equal portions of mustard powder and salt are used. In, Avapacchadi, more mustard powder is used. Because of this, the pickle has a more predominant flavor of mustard.

Usually, it is a byproduct, as the mango pieces which are without kernel (hard seed cover), or pieces that got squished while cutting are used,in addition to some fresh cut pieces!


Mustard paste after drying in direct sun:


Mixing mustard paste with mango mixture:                                                                                     


After mustard paste is mixed with mango mixture:


Ingredients:

  •      3 to 4 cups mango pieces
  •      1 and 1/2 cups chili powder
  •      2 cups mustard powder
  •      1 and 1/2 cups salt
  •      3 tsp turmeric powder

Seasoning:

  •      1 to 2 cups oil
  •      6 or 8 red chilis
  •      3tbsp chana dal
  •      4 tbsp. urad dal
  •      3 tbsp. mustard seeds
  •      a few curry leaves
  •      1 tsp hing (asafetida)

Directions:

  1.      Wash and dry mangoes thoroughly.
  2.      Cut along with skin into half inch cubes. Discard the seed.
  3.      Add turmeric powder, salt and chili powder.
  4.      Mix well and leave it in a dry container for a day.
  5.      Next morning, boil 2 cups of water. Turn off the heat.
  6.      Add mustard powder and mix well. Consistency has to be like dosa/pancake batter.
  7.      Leave it in the hot sun till evening.
  8.      Add the paste to the mango piece mixture.
  9.      By now, mango pieces will have some juice which oozes out after soaking in salt and chili powder.
  10.      Heat oil in a pan and add red chilis, dals and mustard seeds.
  11.      When mustard seeds splutter, add curry leaves.
  12.      Pour the seasoning over the pickle and let it seep through.
  13.      Partially cover the pickle.
  14.      Mix it well from top to bottom.
  15.      Transfer the pickle to a dry jar.


Thokkudu pacchadi with garlic

Thokkudu pacchadi is almost like magaya, as the same ingredients and procedure are used. Only difference is magaya has finger long mango pieces. For thokkudu pacchadi mango is peeled and cut into small cubes. After drying, the pieces are pounded along with chili powder and methi mustard powder. In Telugu, pounding with wooden pestle is called Thokkudu. This pickle gets its name  thokkudu from this. Now, instead of grinding stone and pestle, we use processors! Still the name stays on.
You can garnish with fried garlic or add jaggery and make sweet and sour thokkudu pacchadi.
I am giving the garlic version.
Thokkudu pacchadi stays for more than a year if precautions mentioned in Pickle making -- Introduction are taken.


Mango pieces after adding salt and turmeric powder:


Mango pieces after drying :


Juice after drying:


Mango pieces, chili powder and methi mustard being processed in a chopper:


Ingredients:

  •      About 10 medium sized mangoes
  •      2 to 3 cups chili powder
  •      2 cups salt
  •      2 tbsp. methi (fenugreek) seeds
  •      3 tbsp. mustard seeds
  •      2 tsp turmeric powder
  •      2 cups oil
  •     1 tsp hing (asafetida)
  •     1 to 2 cups garlic peeled.

Directions:

  1.      Wash mangoes after soaking in water.
  2.      Dry the mangoes with dry cloth.
  3.      Peel the skin off using a peeler or scraper.
  4.      Cut peeled mango into 1 cm cube pieces.
  5.      Discard the seeds.
  6.      Add salt and turmeric powder, mix well and set aside in a cool dry place.


Preparing methi mustard powder:

  1.      Roast mustard seeds till they splutter.
  2.      Roast methi (fenugreek) seeds till they turn dark brown. Take a few seeds and try to break and see if it is brown inside also. If so, it is done!
  3.     Grind roasted methi and mustard into coarse powder.
  4.     Set aside.

Drying the mango pieces:

  1.      After 2 days, there will be a lot of juice oozed out of the mango pieces.
  2.      Mix well, squeeze the juice out and spread the pieces on a plastic cloth.
  3.      Save the fluid in the container.
  4.      Dry the pieces on a terrace or a balcony directly under direct sunlight.
  5.      Dry the juice also in the sunlight.
  6.      If you are making the pickle in India, a day's sunlight (April/May) is enough to dry the pieces.
  7.      Keep the pieces in a container for the night.
Final mixing:

  1.      Add chili powder, methi mustard powder to the dried mango pieces.
  2.      Process the pieces in a vegetable chopper or processor. The mixture is not to be made into a paste.
  3.      It has to be coarse with small mango pieces.
  4.      Heat some oil in a pan and add hing (asafetida) and add it to the mango mixture.
  5.      Keep it partially covered.
  6.      Add garlic to enough hot oil in a pan. Let it fry till garlic has a nice aroma and the pods turn brown.
  7.      Add the garlic to the pickle.
  8.      Mix it thoroughly.


Magaya (mango pickle without mustard powder)

Magaya is another very popular pickle from Andhra Pradesh. Basic difference between avakaya and magaya is, you do not use as much of mustard powder as in avakaya. Magaya is more laborious, as the peeling and cutting of mangoes, soaking and drying in the sun etc are more time taking and laborious.
Selecting the mangoes for magaya, you have to look for even sized mangoes. For magaya, mango has to be less fibrous or hairy on the seed.
Magaya stays good for an year or even more, if all the precautions in selecting, etc mentioned in pickle making -- introduction are followed.


Magaya freshly made:


Magaya after about a month:


Mango pieces with salt:


Mango pieces after drying:


Mango juice after drying:


Ingredients:

  •      35 to 40 mangoes
  •      1/2 kg (1 lb) salt
  •      1/2 kg (1 lb) chili powder
  •      5 tbsp. methi (fenugreek) seeds
  •      5 tbsp. Mustard seeds
  •      4 tbsp. turmeric powder
  •      1/2 to less than 1 liter oil
  •      3 tsp. hing (asafetida)


Directions:

  1.      Soak mangoes in a tub of water for 30 minutes.
  2.      Dry them completely using a soft, clean cloth.
  3.      Spread the mangoes on a dry cloth. Peel each of them using a sharp scraper or peeler.
  4.      Cut them into l/2 inch wide and finger long pieces.
  5.      The seed when it is soaked in salt chili and oil, tastes great. But now, nobody has the time to sit, eat and enjoy the small pleasures! The seed takes too much space in the jar. So usually the seed is discarded.
  6.      Put the mango pieces in a large vessel.
  7.      Add turmeric powder and salt. Mix it nicely with hand. You can feel the sour mango pieces ooze moist juice.
  8.      Transfer to a deep jar and keep it covered for 2 days.

Preparing methi mustard powder:

Roast mustard seeds till they splutter.
Roast methi (fenugreek) seeds till they turn dark brown. Take a few seeds and try to break and see if it is brown inside also. If so, it is done!
Grind roasted methi and mustard into coarse powder.
Set aside.

Drying the mango pieces:

  1.      On 3rd day, mix thoroughly with hand, reaching up to the bottom.
  2.      Squeeze the pieces and spread them on a plastic sheet. Try to squeeze out the juice as much as possible.
  3.      Save the juice that is collected in the jar.
  4.      Leave the juice in hot sun, covering it partially.
  5.      Put the plastic sheet on to a terrace or balcony and let it dry under direct sunlight.
  6.      If you are making the pickle in India, one day's hot sun (April/May) is enough to dry the pieces.
  7.      If the pieces are too dry, magaya tends to be too dry and not very juicy.

Mixing magaya:

  1.      Add chili powder and methi mustard powder to the juice.
  2.      Add the dried mango pieces to the juice mixture.
  3.      Mix it well.
  4.      Heat oil in a pan. When the oil is hot, add hing.
  5.      Add the oil to mango pieces which are covered with chili powder.
  6.      Cover the jar partially.
  7.      Mix it well after 30 minutes.


Avakaya - Andhra hot pickle

Avakaya derives its name from the main ingredient used in making the pickle, aavalu (mustard seeds).  Many Telugu people would like to eat it along with rice, right from the time the mango pieces are mixed with the chili mixture. For those, who are not acclimatized to the taste, the same would be bitter!
Mango pickle after the pieces are soaked for 2 days, tastes very nice when eaten with hot rice and ghee, and thick curd (yogurt) by the side!

The pickle stays for more than one year, if all the precautions mentioned in pickle making -- introduction.


Avakaya, about a month after making:


Avakaya with garlic, about a month after making:


Mango pieces cut into equal size pieces:


Mango pieces mixed in chili mixture with some oil added, ready to be put into a jar:           


Fresh pickle put in a jar:                                                                                                               


Ingredients:

  •      1 kg (2 lbs) chili powder
  •      1 kg (2 lbs) mustard powder
  •      1 kg (2lbs) salt
  •      100 gm methi seeds (fenugreek)
  •      4 tbsp. turmeric powder
  •      25 medium size or 30 small size mangos
  •      1 to 2 liters of oil

Directions:

  1.      Wash and dry the mangoes.
  2.      Cut them into 1 and 1/2 inch square pieces (cutting them along with the kernel).
  3.      Clean each of the pieces with dry cloth again, removing the seed and the thin film around the seed. You may need to use a sharp knife to remove the thin film.
  4.      Mix all the powders in a large plate.
  5.      Add turmeric and methi seeds (fenugreek).
  6.      Mix a cup of oil.
  7.      Approximately, for one measure of the masala mixture, one and half measures of cut pieces are added.
  8.      Put 2 cups of pieces into the mixture.
  9.      Drop a few spoons of oil to the bottom of the vessel.
  10.      Drop the mango pieces coated with chili mixture into the vessel.
  11.      Keep adding the pieces and mixture till all the mango pieces are in the vessel.
  12.      Top it with half of the oil.
  13.      Cover and leave it in a cool dry place.
  14.      By next day the volume of the pickle will be less.
  15.      On the third day, mix it thoroughly, using a long dry spoon or by hand.
  16.      Make sure that the spoon/hand reaches the bottom of the vessel.
  17.      Add more oil. See that the pieces are completely immersed in oil.
  18.      Oil must be at least 1 inch above the pickle level.
  19.      Transfer the pickle into a dry airtight jar and keep in a cool dry place,
  20.      Small amounts of pickle can be transferred into a small serving jar for daily use.
  21.      Extreme care must be taken in handling the pickle with dry spoon.

Variation:

2 cups garlic peeled.
Add garlic to the prepared pickle and mix it well.
Make sure the oil is 1 inch above the pickle.
Keep covered and let it sit for a few days.
Mix it well once in between.
Avakaya with garlic will be ready to eat in 10 days.


Pulihora (Tamarind rice/Tangy flavored rice)

Pulihora, tangy rice dish mixed with spices and garnished with roasted peanuts or cashews and curry leaves is a sort of one course meal when you take it for outside picnics etc. It is usually served with raita which is made by adding cucumber/coconut/tomato etc to curd (yogurt) and seasoned. The aroma of pulihora is enticing and brings memories of mother's or grandmother's kitchens!

Pulihora tastes best after sitting for a couple of hours from the time of preparation.


Cooked rice after adding salt and turmeric:


Seasoning frying in a pan:


Seasoning ready after tamarind paste is cooked:


Ingredients:

  •      1 cup long grained rice
  •      1 tsp turmeric powder
  •      2 to 3 tbsp tamarind paste
  •      Salt to taste

For seasoning:

  •      5 tbsp oil
  •      3 to 4 red chilis
  •      1 tsp chana dal
  •      1 tsp urad dal
  •      1/2 tsp mustard seeds
  •      Pinch of hing (asafetida)
  •      4 to 5 green chilis cut into long pieces
  •      1/2 inch ginger cut into small pieces
  •      A few curry leaves
  •      1/4 cup roasted peanuts/ cashew (optional)
  •      2 tsp roasted sesame powder (optional)

Directions:

  1.      Cook the rice so that the grains separate and rice is not overcooked.
  2.      Add some oil, turmeric powder, salt and a few curry leaves.

Seasoning:

  1.      ** In a heated pan, add 3 tbsp. of oil.
  2.      When oil is hot, add red chilis and the seasoning.
  3.      When the mustard seeds splutter, add ginger, green chilis, curry leaves and peanuts.
  4.      Add tamarind paste.
  5.      Add a pinch of turmeric and 1/2 tsp salt.
  6.      Let it cook till oil separates (when the tamarind loses its raw smell).
  7.      Add this paste to the rice mixture.
  8.      Mix thoroughly.
  9.      Add sesame powder and mix well.

Note:

The tamarind mixture (pulikachal) can be kept in a bottle for later time use. Great as an
instant pulihora mix while traveling!
The same mixture can be added to washed and moist poha (flat rice). To make instant poha pulihora, add the mixture, salt and mix well.


Tuesday, 3 June 2014

Pongaralu with atukulu (Poha/flat rice dosa)

Atukulu, flattened rice (also called beaten rice) is dehusked rice which is beaten into dry flat flakes. Thickness of the flat rice varies from translucent flakes to thicker than rice grain flakes. Flat rice is available in Indian stores in USA. When added to any liquid, the flakes swell as they soak the fluid. In India atukulu known as chiuda or poha are available in all regions. Many snacks are made using atukulu.

Poha dosa is an Andhra Pradesh speciality. Pongaralu made using atukulu (poha, flat rice) is a variety of dosa . No dal is used in this dosa.

Unlike dosa, pongaralu are not spread on the hot pan. A large spoonful of batter is dropped on the hot pan in the center and let to spread on its own. They are very spongy and soft dosas. Also fermentation time is less, so they can easily be made in winter season.


Ingredients:

  •      1 cup atukulu
  •      2 cups rice  
  •      1/2 cup buttermilk or curd (yogurt)
  •      1/2 tsp methi seeds
  •      1 tsp baking soda
  •      Salt to taste
  •      Grated carrot and finely cut cilantro for garnish

Directions:

  1.      Soak rice along with methi seeds in water for about 4 to 5 hours.
  2.      In winter, soaking time may be extended.
  3.      Wash flat rice in water and soak in curd/buttermilk (yogurt) for equal time.
  4.      Grind rice and soaked flat rice together.
  5.      Do not add much water while grinding -- consistency when ready should be a little thicker than  dosa batter (pancake batter).
  6.      Add salt and baking soda. Mix together and allow it to ferment for at least 4 to 5 hours, in warm weather. When room temperature is very cold, it is better to leave it to ferment overnight. Batter is fermented when it is bubbly, may not necessarily rise. Look for bubbly consistency to make sure of fermenting.
  7.      On a hot griddle, spray or spread a spoon of oil.
  8.      Pour batter at the center, do not spread. Let it flatten by itself.
  9.      Put a spoon of oil around the edge of the dosa.
  10.      Garnish with carrot and cilantro.
  11.      Cover with lid, and let it cook for 2 to3 minutes.
  12.      Flip and let it cook uncovered for 2 to 3 minutes.
  13.     Serve hot with allam pacchadi or carrot pacchadi or sambar.

Note:

For pongaralu, you can use what is called "idli rice", which is less expensive and coarser than basumati or the more expensive finer varieties.
Idli rice is available in all the stores in India.  Idili rice is available in many Indian stores in USA.