Showing posts with label Andhra cooking. Show all posts

Wednesday, 11 September 2019

Chukkakura, pesarapappu and lauki subzi (Khatta palak, moong dal lauki subzi)


Chukkakura or khatta palak is a green vegetable available year round in many parts of India. The leaves are medium to large in size and broad and arrow shaped. Chukka leaves look similar to spinach or palak. They have a tart taste reminding of citrus. The younger leaves are less acidic.

In USA the equivalent to this plant is green sorrel. Many Indians use green sorrel in their cooking in place of chukkakura.

Chukkakura plant is grown solely for its leaves. It has been used since ancient times both medicinally to aid digestion and for culinary purposes. Chukka leaves are high in vitamin C, calcium, magnesium and potassium.

Because the leaves are tart, the leaves are used many nonvegetarian dishes also.

In Andhra Pradesh many dishes like dals and subzis are made using chukkakura. Here is a recipe with sorakaya, moong dal and chukkakura. All the ingredients that are essential for daily meals.


Ingredients:

  •      2 cups chukkakura chopped
  •      1 cup sorakaya/lauki/bottle gourd pieces
  •      1/2 cup moong dal
  •      1/2 cup grated coconut (optional)
Seasoning:
  •      2 Tsp. oil
  •      1 or 2 red chile
  •      1 Tsp. urad dal
  •      1/2 Tsp. mustard seeds
  •      1/2 Tsp. jeera seeds
  •      Pinch of hing (asafetida)
  •      Few curry leaves
  •      Salt to taste
Directions:
  1.      Soak moong dal for about 2 hours.
  2.      Wash and clean chukkakura.
  3.      Chop the vegetable in to pieces.
  4.      Wash and peel sorakaya.
  5.      Cut into small pieces.
  6.      Heat oil in a thick pan.
  7.      Add red chile, and urad dal.
  8.      Cook for a minute.
  9.      Add mustard and jeera seeds.
  10.      When mustard seeds are spluttering add hing and curry leaves.
  11.      Add lauki pieces.
  12.      Cook for a few minutes.
  13.      Wash and drain moong dal.
  14.      Add drained dal to the ingredients in the pan.
  15.      Mix well.
  16.      After a few minutes, add chopped chukkakura.
  17.      Add salt and mix well.
  18.      Add grated coconut (optional).
  19.      Cover and cook on low heat.
  20.      Keep mixing so that the subzi is not burnt.
  21.      When the dal and lauki pieces are soft, stop cooking.
  22.      The subzi must not be overcooked and mushy.
  23.      Keep covered and let it cool a bit.
  24.      Transfer to a serving dish.
  25.      Garnish with cilantro and fresh grated coconut.
  26.      A healthy and tasty side dish for roti and rice.


Tuesday, 29 August 2017

Aakakara kaya kura (Kakoda/Teasle gourd subzi)


Aakakara kaya, known as kakoda in Hindi is a species of flowering plant in the gourd family. It is known as Bristly balsam pear, spiny gourd or teasle gourd. Aakakara kaya is eaten in all regions of India and some parts of South Asia. In some parts of Andhra, it is known as boda kakara kaya also. This is a seasonal vegetable which is in markets during monsoon. 

The fruit has a lot of health benefits. Some of the benefits are reducing blood sugar levels, reducing chances of cancer, reducing excess sweating etc. Also, help in anti-aging, improving eyesight are some more benefits. High fiber content helps in easy digestion.


Ingredients:

  •      2 cups aakakara kaya pieces
  •      1/2 Tsp. turmeric powder
  •      1 Tbs. tamarind paste
  •      2 Tbs. jaggery pieces or powder
  •      1 Tsp. rice flour
  •      Salt to taste

Seasoning:


  •      2 Tsp. oil
  •      1 or 2 red chiles
  •      1 Tsp. urad dal
  •      1/2 Tsp. mustard seeds
  •      1/2 Tsp. jeera seeds
  •      Pinch of  hing (asafetida)
  •      Few curry leaves

Directions:


  1.      Wash and cut aakakara kaya in to discs or long pieces.
  2.      Remove seeds, if they are too hard and tough.
  3.      Boil water in a pan and add the pieces.
  4.      Add turmeric powder.
  5.      When the pieces are slightly soft, remove from heat.
  6.      Drain the water and set aside the pieces.
  7.      Heat oil in a thick pan.
  8.      Add red chile, urad dal, mustard seeds, and jeera seeds.
  9.      When mustard seeds splutter, add hing and curry leaves.
  10.      Add the cooked aakakara kaya pieces.
  11.      Mix well.
  12.      Add tamarind paste.
  13.      Keep stirring and add jaggery and rice flour.
  14.      Reduce flame and keep mixing.
  15.      Cook for five minutes and remove from heat.
  16.      Transfer to serving dish.
  17.      Can be eaten along with roti or rice.

Tuesday, 15 August 2017

Vakkaya (karuanda) pulihara (Rice flavored with vakkaya)

Vakkaya is well known as Karuanda in Hindi. It is also known as pickle berry! The fruit is quite tangy. Variety of chutneys and pickles are made using these fruits. Vakkaya contains pectin and accordingly is a useful ingredient in making jelly, jam and chutneys.

Vakkaya is a rich source of iron, so sometimes it is used in treatment of anaemia. It contains a fair amount of Vitamin C. The fruits are available during monsoon season. Ripe fruits exude a white latex when severed from branch.

Vakkaya is very similar to cranberries, available in USA at Thanksgiving time. Many Indians who reside in USA, use cranberry as an equivalent in many vakkaya recipes.


Ingredients:

  •      1/2 cup (approx) vakkaya (karuanda)
  •      2 cups cooked rice
  •      3 Tbs. oil
  •      2 or 3 green chiles
  •      1 Tsp. chopped ginger
  •      1/2 Tsp. turmeric powder
  •      Salt to taste


Seasoning:

  •      3 or 4  red chiles
  •      2 Tsp. chana dal
  •      1 Tsp. urad dal
  •      1 Tsp. mustard seeds
  •      Some hing (asafetida)
  •      Few curry leaves


Directions:


  1.      Cook rice in pressure cooker and let it cool. See that rice is not overcooked.    
  2.      Wash and cut vakkayalu (karuanda) either into 2 or 4 pieces.
  3.      Remove the seeds. It is easier to remove the seeds, if you place them in water for a few minutes after cutting.
  4.      Set the pieces aside.
  5.      Heat oil in a thick pan.
  6.      Add red chiles.
  7.      After a minute, add chana dal, urad dal and mustard seeds.
  8.      When mustard seeds splutter, add hing.
  9.      Add green chiles and ginger.
  10.      Add curry leaves.
  11.      Let the mixture cook for a few minutes.
  12.      Add karuanda pieces.
  13.      Keep stirring for a few minutes, till the pieces are slightly soft.
  14.      Add turmeric powder.
  15.      Mix well.
  16.      Add cooked rice and stir well.
  17.      Add salt.
  18.      Mix well, cover and let cook for 5 minutes.
  19.     Turn the heat off.
  20.     Pulihora (flavoured rice) tastes very nice if left to sit for some time.
  21.     Tastes nice along with raita or majjiga pulusu.


Monday, 4 July 2016

parwal kothimira karam kura

Parwal is ethnic to India (esp North) and is not available elsewhere. It is easily available in North and Eastern India.  Even in South India, it was not available earlier.  Parwal resembles kundru (dondakaya/gherkin/coccinia). Parwal is a seasonal vegetable available in summer season.
Parwal is easy to digest and so recommended for patients with weak digestion, jaundice etc.

Many varieties of subzi are made using parwal with different ingredient combinations. Aloo parwal (parwal with potato) is a very popular and favorite one!

I am giving a subzi which is less time consuming and tasty as well!


Ingredients:

  •       8 or 10 parwal
  •       1/2 cup kothimira (cilantro) cleaned and chopped
  •       2 or 3 green chiles  (according to taste)
  •       Salt to taste
  •       2 or 3 tsp. oil

Directions:

  1.      Cut parwal in quarter lengthwise.
  2.      Grind cilantro, chiles and salt together in a grinder.
  3.      Heat oil in a pressure cooker.
  4.      Add parwal pieces and cilantro masala.
  5.      Add two or three spoons of water.
  6.      Mix well, cover and cook for one or two whistles.
  7.      Remove the lid when the pressure comes to normal.
  8.      Cook for 4 to 5 minutes till water evaporates.
  9.      Serve with rotis or rice.


Thursday, 14 April 2016

Vankaya kura with cashew (Eggplant subzi with cashew)

Cashews are grown widely in coastal areas of India. Before the cashew nuts are fully ready, the nuts are harvested in their tender form, when the shell is not hardened. At that stage, the shell is easily cut open and the kernel is removed. But the kernel is corrosive and is harmful and so gloves should be used. Even the cashew has to be soaked in hot water and the outer skin has to be removed. The tender cashew is very tasty and gives an exotic taste to the dish! These tender cashews have a very short season and are not available in stores throughout the year.

At times when the tender cashew is not available, if you want to make the subzi, you can soak regular cashew nuts in boiling water for 2 to 4 hours and use them.

In coastal districts of Andhra Pradesh, Goa, Kerala etc. tender cashew is available around March/April time.

Any vankayalu (eggplant), long or small round variety can be used for this subzi. Make sure that eggplant is tender and no seeds are there. You may use any amount of eggplant and cashew of your choice or availability. There is no particular proportion.


   Ripe cashew-apple                                                                         Green cashew just starting


Ingredients:

  •      8 or 10 vankayalu (small eggplant)
  •      1/4th cup cashew nuts
  •      1/2 Tsp. turmeric powder
  •      3 or 4 green chilis
  •      2 Tsp.adrak (ginger grated)
  •      2 Tbsp. oil
  •      Salt to taste
  •      Some cilantro (optional)

Directions:
 
  1.      Boil a cup of water.
  2.      Soak cashews in hot water for about 3 hours.
  3.      Grind green chilis and ginger and cilantro.
  4.      Cut eggplant into thin long pieces.
  5.      Heat oil in a deep and thick pan.
  6.      Add eggplant and turmeric powder. Keep stirring.
  7.      After 5 minutes, drain cashew nuts and add them to eggplant.
  8.      Add ginger chili paste and salt.
  9.      Cover and cook on low heat.
  10.      Keep stirring.
  11.      Cook till eggplant and cashew are soft.
  12.      Cashew adds an exotic look and taste to the subzi.

Caution:  In case, you have a chance to use tender cashew and have to cut and clean the kernel, you must use gloves and protect your hands and face etc, as the oil which comes out of the kernel is corrosive!


Thursday, 17 September 2015

Tomatillo tomato chutney

Continuing with my experiments using tomatillos, I tried making tomato and tomatillo chutney. I used roma tomatoes which gave the very attractive color to the  chutney. As tomatillos were ripening, they gave a very nice sweet taste. The combined effect was, the chutney was almost like tomato ketch up!! Spice level can be adjusted according to taste by controlling the amount of chile powder.

This chutney can be saved in refrigerator for about a month. It comes in handy as a side dish to rice roti etc.


Ingredients:

  •      8 or 10 tomatoes (medium sized)
  •      8 or 19 tomatillos
  •      3 or 4 Tbsp. oil
  •      2 Tbsp. tamarind juice or about a ping pong ball sized tamarind.
  •      2 Tbsp. chile powder
  •      1 Tsp. methi-mustard powder
  •      1/2 Tsp. turmeric powder
  •      Pinch  of hing
  •      Salt to taste

Directions:

  1.      Remove the husk, clean and wash tomatillos thoroughly.
  2.      Cut them in to 4 pieces each and set aside.
  3.      Wash and cut tomatoes also into 4 or 6 pieces each.
  4.      Heat a little oil in a thick pan,
  5.      Add all the pieces of tomatoes and tomatillos and keep stirring.
  6.      Cook till all the liquid is evaporated.
  7.      Add tamarind ball to the pulp and let it cool.
  8.      Add all the other ingredients except hing and grind together.
  9.      Heat the rest of oil, add hing and pour it over the chutney.
  10.      Chutney can be kept for about a month in refrigerator.
  11.      Can be served with rice, roti, idli or dosa.
     

Thursday, 27 August 2015

Vangibhat with daliya (cracked wheat/bulgar with eggplant)

Vangibhat or eggplant rice is a very popular dish from South Indian state of Karnataka. Now, it is prepared in Andhra Pradesh and Tamilnadu also. Usually it is rice cooked along with eggplant and special masala. Vangibhat masala is available in stores. But freshly made masala flavor is different. There are many recipes to make the masala. In this recipe, I used minimum ingredients, so that, eggplant flavor dominates!

As diabetics try to eat less rice and try other alternatives to rice, I thought of making vangibhat with daliya. The same can be tried with quinoa also.

Daliya is cracked wheat, available in many Indian stores. Bulgar, which is easily available in USA, is also an equivalent. Daliya/bulgar can be cooked in a pressure cooker or on open heat.

Very tender eggplant tastes good for vangibhat.


Ingredients:

  •      1 cup daliya (wheat ravva)
  •      6 to 8 vankayalu (baigan/eggplant)
  •      1 red chile
  •      1/2 tsp. turmeric
  •      2 Tbsp. chana dal
  •      3 Tbsp. urad dal
  •      2 Tbsp. coriander seeds
  •      Pinch of hing
  •      3 Tbsp. dry grated coconut
  •      Salt to taste
  •      4 tsp. oil
  •      Few curry leaves

Directions:

  1.      Roast red chile and chana dal without oil, in a pan.
  2.      Add urad dal and coriander seeds
  3.      Roast for a few minutes.
  4.      When dals are getting brown in color, stop the heat.
  5.      Add hing and grated coconut.
  6.      Mix well and let the mixture cool.
  7.      Clean eggplant and cut them into thin slices.
  8.      Cook daliya in a pressure cooker or on open heat.
  9.      Fluff it and let it cool.
  10.      Grind the dal mixture in a grinder to make a coarse powder.
  11.      Place eggplant pieces in a microwave safe bowl, add a spoon of oil and turmeric.
  12.      Mix well and microwave for 2 to 3 minutes on high.
  13.     Heat oil in a deep pan and add curry leaves and eggplant.
  14.     Add dal mixture and mix well.
  15.     Add salt and mix well.
  16.     Add cooked daliya and stir well.
  17.     Reduce heat and let it cook for 8 to 10 minutes, so that daliya gets all the flavors of masala and eggplant.
  18.     Add ghee and close the lid.
  19.     Turn off heat.
  20.     Can be served with carrot raita.
 

Monday, 10 August 2015

Thotakura pulusu (Chaulai saag/Amaranth pulusu)

Thotakura is a very popular leafy vegetable available all over India and in many countries. Some small leaf varieties are easily available in India. Amaranth is available in large sized red and green colored species also. In USA, the red and green color varieties are available in farmers' markets and other Asian stores.

In Uttar Pradesh and Bihar, it is called Chaulai, in Karnataka Harive, in Kerala Cheera, in Tamil Nadu Keerai, in Orissa Khada Saga and in Maharashtra it is called Shravani Maath. Many local recipes are available in different parts of India.

Cooked Amaranth leaves are a good source of Vitamin A, Vitamin C and folate. They are a complementing source of many dietary minerals also. Cooked leaves are a good source of fiber. Many families are now including leafy vegetables in their daily menus.

In Andhra Pradesh, thotakura pappu (Amaranth dal) and thotakura pulusu are usually prepared. Recipes are available for dry thotakura subzi also. I am giving a recipe for making pulusu, cooking amaranth along with tamarind juice and other seasonings. It can be served with rice or roti.

In USA, large bunches of amaranth are available, whereas, in India, smaller bunches of small leaf thotakura are available. Pictures of both are inserted.

If green mangoes or tender tamarind are available, tamarind juice can be replaced with appropriate amount of green mango or tender tamarind. You may try replacing tamarind by rhubarb also!


Amaranth available in USA:                                                         Thotakura from Andhra Pradesh


Ingredients:

  •      2 to 3 Tbsp. onion chopped
  •      1 large bunch of thotakura (Amaranth)
  •      2 to 3 green chiles
  •      2 Tbsp. tamarind paste
  •      1/2 tsp. turmeric powder
  •      Pinch of hing (Asafetida)
  •      Salt to taste
  •      2 to 3 Tbsp. rice flour (as needed)

Seasoning:

  •      2 red chiles
  •      1 tsp. methi seeds
  •      1 tsp. mustard seeds
  •      1 tsp. jeera seeds
  •      Pinch of hing (Asafetida)
  •      4 or 5 pods  garlic (Optional)

Directions:

  1.      Clean and cut thotakura into 1/2 inch pieces.
  2.      Put onion pieces and thotakura in a deep pan.
  3.      Add enough water to cook, maybe just to cover the greens.
  4.      Cook till thotakura is tender.
  5.      Add green chile, tamarind, turmeric powder, hing and salt.
  6.      Keep cooking for 10 minutes.
  7.      Mix rice powder in a little water to make a paste.
  8.      Add gradually to the pulusu.
  9.      Keep stirring so that the rice paste gets mixed and is not lumpy.
  10.      Add enough rice flour to get the thickness you like.
  11.      Keep stirring and cook for 2 to 3 minutes.
  12.      Heat oil in a separate pan and add red chiles.
  13.      After a minute, add methi, jeera and mustard seeds.
  14.      Add hing and add to the pulusu.
  15.      Cover and turn off the heat.
  16.      If you like, fry garlic pods in oil and add as topping.

Note: I add more rice flour to make thick pulusu. Some people like to make slightly watery pulusu. Depending on the consistency you like, adjust the amount of rice flour. In place of rice flour, you may use besan (chickpea flour) also.


Monday, 6 July 2015

Chintachiguru paneer rice (Rice and paneer flavored with chintachiguru)


Chinta chiguru, tender tamarind leaves,is available in South India during early spring. As the name suggests, tender leaves from tamarind tree are sold in Andhra Pradesh and other South Indian states. The leaves have a subtle tart flavor without being overly sour. They increase the nutrient value of the dish and add a nice tangy taste to it. Quite a few dishes are made with the leaves like chinta chiguru chutney, chinta chiguru pulao etc.
 
The leaves are a good source of vitamin C. As any seasonal vegetable, use of the leaves is recommended by nutritionists.

When the leaves are fully grown, they are not easily chewable and are not tasty!


Ingredients:

  •      2 cups chinta chiguru
  •      1 cup paneer cubes
  •      1 cup onion chopped
  •      2 cups rice cooked
  •      3 to 4 green chiles
  •      1/2 inch ginger chopped
  •      2 to 3 red chiles
  •      2 tsp. chana dal
  •      1 tsp. urad dal
  •      1 tsp. mustard seeds
  •      Pinch of hing (Asafetida)
  •      Few curry leaves
  •      5 Tbsp. oil
  •      Salt to taste

Directions:

  1.      Place chinta chiguru in a large plate and take the leaves along with stems between the palms and rub well.
  2.      Leaves are thus separated from the stems. Stems do not taste good and also are troublesome while eating!! 
  3.      Remove the stems and collect the tender leaves.
  4.      Wash the leaves and set them aside.
  5.      Cut paneer into cubes and set aside.
  6.      Cook rice and see that the grains separate when cooked.
  7.      In a deep pan, heat oil.
  8.      Add red chile and after a few minutes, add chana dal and urad dal.
  9.      When dal becomes golden in color, add mustard seeds.
  10.      Add green chiles and ginger when mustard seeds splutter.
  11.      Add hing and curry leaves.
  12.      Add chopped onion and stir well.
  13.      When onion pieces are translucent, add chinta chiguru and stir well
  14.      After a few minutes of cooking, add paneer pieces.
  15.      Keep stirring, so that paneer pieces get a good coating of chinta chiguru.
  16.      Add a little salt.
  17.      Set aside the mixture for an hour or so, so that paneer pieces are marinated well. 
  18.      Heat the mixture again and add cooked rice.
  19.      Add salt and mix well.
  20.      Cook for 10 to 15 minutes.
  21.      Serve after a little while.
  22.      Tastes nice with raita.

Thursday, 23 April 2015

Menthulu pulusu/Methi gojju (Fenugreek stew)

 
Methi seeds and leaves (Fenugreek seeds and green fenugreek) are widely used in Indian cuisine and also many other Asian cuisines. Methi is grown in most of the Asian countries and all over India.

Methi is well known for its health benefits. It is said that methi helps reduce cholesterol, reduce risk of heart disease, control blood sugar levels in diabetics, aid digestion, reduces acid reflux and heartburn. It is supposed to be a remedy for fever and sore throat. In South Indian cooking, every dish whether it is a chutney or dal or pulusu, the basic seasoning consists of methi seeds.

Methi is used as herb, spice, vegetable or sprouts.

I am giving a recipe where methi is a main ingredient along with onion. Either soaked methi can be used or methi sprouts can be used for this recipe. The consistency is thick so that it can be used as a side dish for many main dishes.


Ingredients:

  •      2 or 3 Tbs. Methi seeds (Soaked and drained or sprouted)
  •      2 cups Onion finely chopped
  •      3 Tbs. Tamarind paste
  •      3 to 4 Tbs. Jaggery
  •      Salt to taste
  •      1/4 Tsp. Turmeric powder
  •      2 Tbs. Rice flour

  •      2  Red chiles
  •      1/2 Tsp. Mustard seeds
  •      1/2 Tsp. Jeera seeds
  •      2 Tsp. oil
  •      A pinch of Hing (Asafetida)
  •      A few curry  leaves

Directions:


  1.      Soak methi seeds overnight. You may sprout them, if you like.
  2.      Fine chop onion.
  3.      Heat oil in a pressure cooker.
  4.      Add red chiles, mustard and jeera seeds.
  5.      When mustard seeds splutter, add curry leaves and hing.
  6.      Keep stirring.
  7.      Add soaked and drained methi and stir.
  8.      Add onion pieces and keep cooking.
  9.      Add turmeric powder, salt.
  10.      When the onion pieces are half cooked, add tamarind paste, jaggery and mix thoroughly.
  11.      Cover the cooker, and cook till three whistles.
  12.      When the steam pressure is reduced, open the cooker.
  13.      Keep cooking.
  14.      Add some water to the rice flour to make a paste.
  15.      Add the paste to the mixture and keep cooking on low heat.
  16.      When the required consistency is reached, stop cooking.
  17.      It may be served either hot or cold.
Methi pulusu is made thick, more like a stew and is a good side dish for rice, chapatti, dosa etc.


Wednesday, 22 April 2015

Pindi Pulihora (Mango flavored cracked rice)

In Telugu "ravva" means cracked, like Bombay ravva for sooji and godhuma ravva for daliya (cracked wheat). Main ingredient for this recipe is rice ravva. It is different from idli ravva. In Andhra, it is available in stores, sold as rice ravva. It can be made at home in the grinder. Wash rice in water and dry it for a few hours. Then coarse grind the rice. This ravva is used in undrallu or modakas made for Ganesh puja.

Cooking the ravva is more like cooking cous cous in USA.  More than enough water is boiled in a large container, a few minutes after adding ravva, most of the water is drained off. Then the container is covered and heated on low heat for 4 to 5 minutes. The resulting mixture is like small grains of sand. It should not be sticky.

In this recipe, instead of tamarind or lemon, I used grated green mango. Of course, in India the mangoes are usually very sour. You have to adjust the amount of mango, according to the sourness of the mango and your taste!


Ingredients:

  •      2 cups rice ravva
  •      1/2 to 3/4 cup grated green mango
  •      Salt to taste
  •      1/4 Tsp. Turmeric powder

Seasoning:

  •      4 to Tbsp. oil
  •      3 to 4 Red chiles
  •      2 Tsp. Chana dal
  •      2 Tsp. Urad dal
  •      1 Tsp. Mustard seeds
  •      A few curry  leaves
  •      A pinch Hing (Asafetida)
  •      1/2 cup peanuts (Optional)

Directions:

  1.      Boil nearly 5 cups of water in a thick bottomed large container.
  2.      When water is boiling, add a tea spoon of oil.
  3.      Add rice ravva while stirring.
  4.      When the mixture starts to cook, drain water from the container.
  5.      Cook the drained mixture on low flame while keeping it covered.
  6.      After 5 minutes, remove from heat.
  7.      Mix it well using a long fork.
  8.      Add grated mango.
  9.      Add 2 table spoons oil, turmeric powder and salt.
  10.      Mix it well, transfer to a plate and let it settle.
  11.      Heat oil in a pan, add red chiles, and dals.
  12.      After 2 minutes, add mustard seeds.
  13.      When the seeds splutter, add curry leaves and hing.
  14.      Add peanuts and let them all cook for a few minutes.
  15.      Add seasoning, mix well.
  16.      Transfer to a serving dish and keep it covered. 
Pulihora is served along with raita or majjiga pulusu. If eaten after 2 or 3 hours of making, Pulihora tastes nice.


Wednesday, 11 February 2015

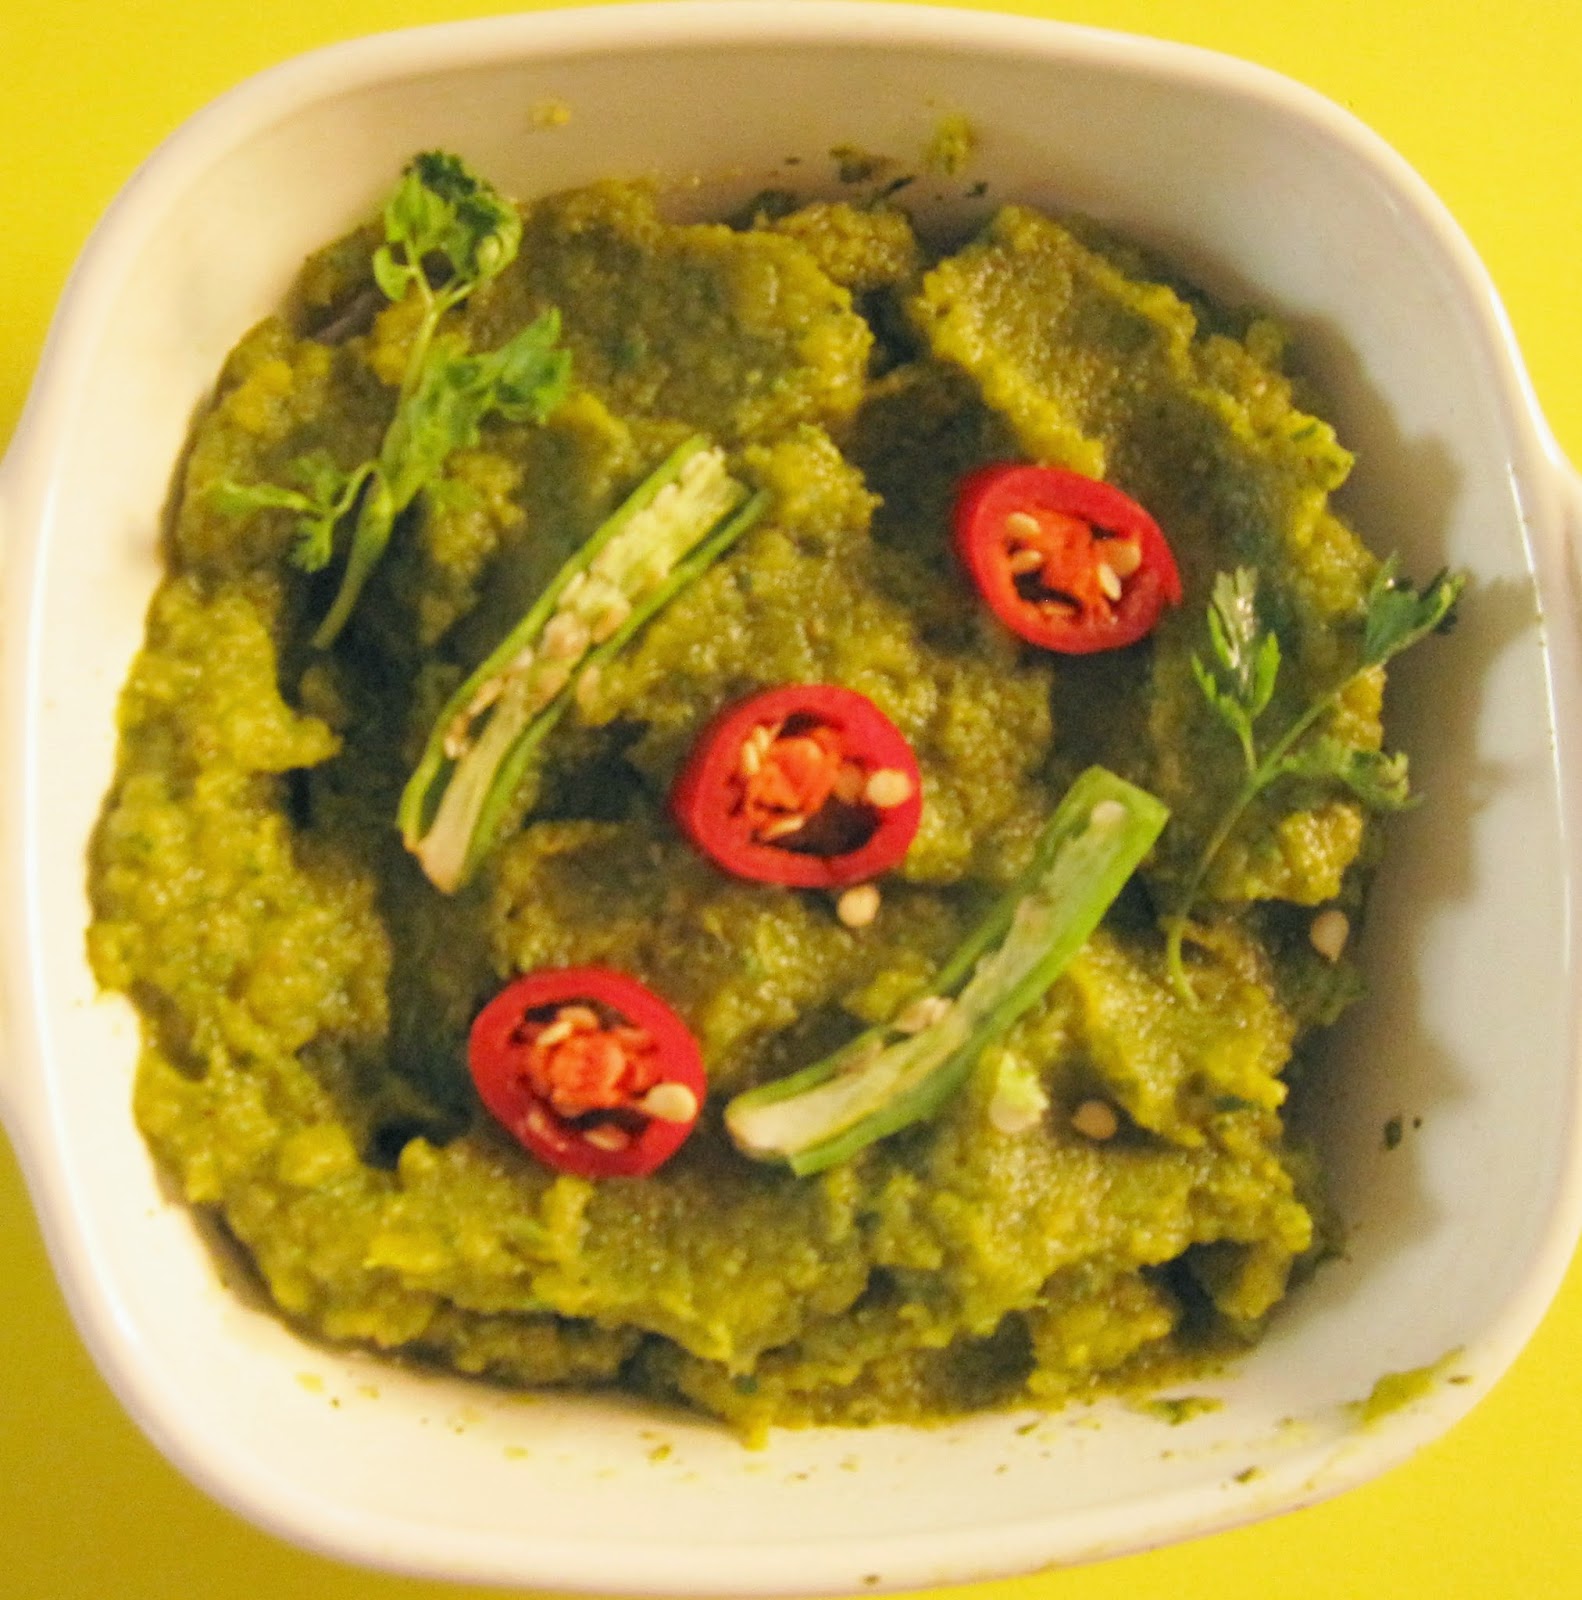
Usirikaya pacchadi (amla/Indian gooseberry chutney)


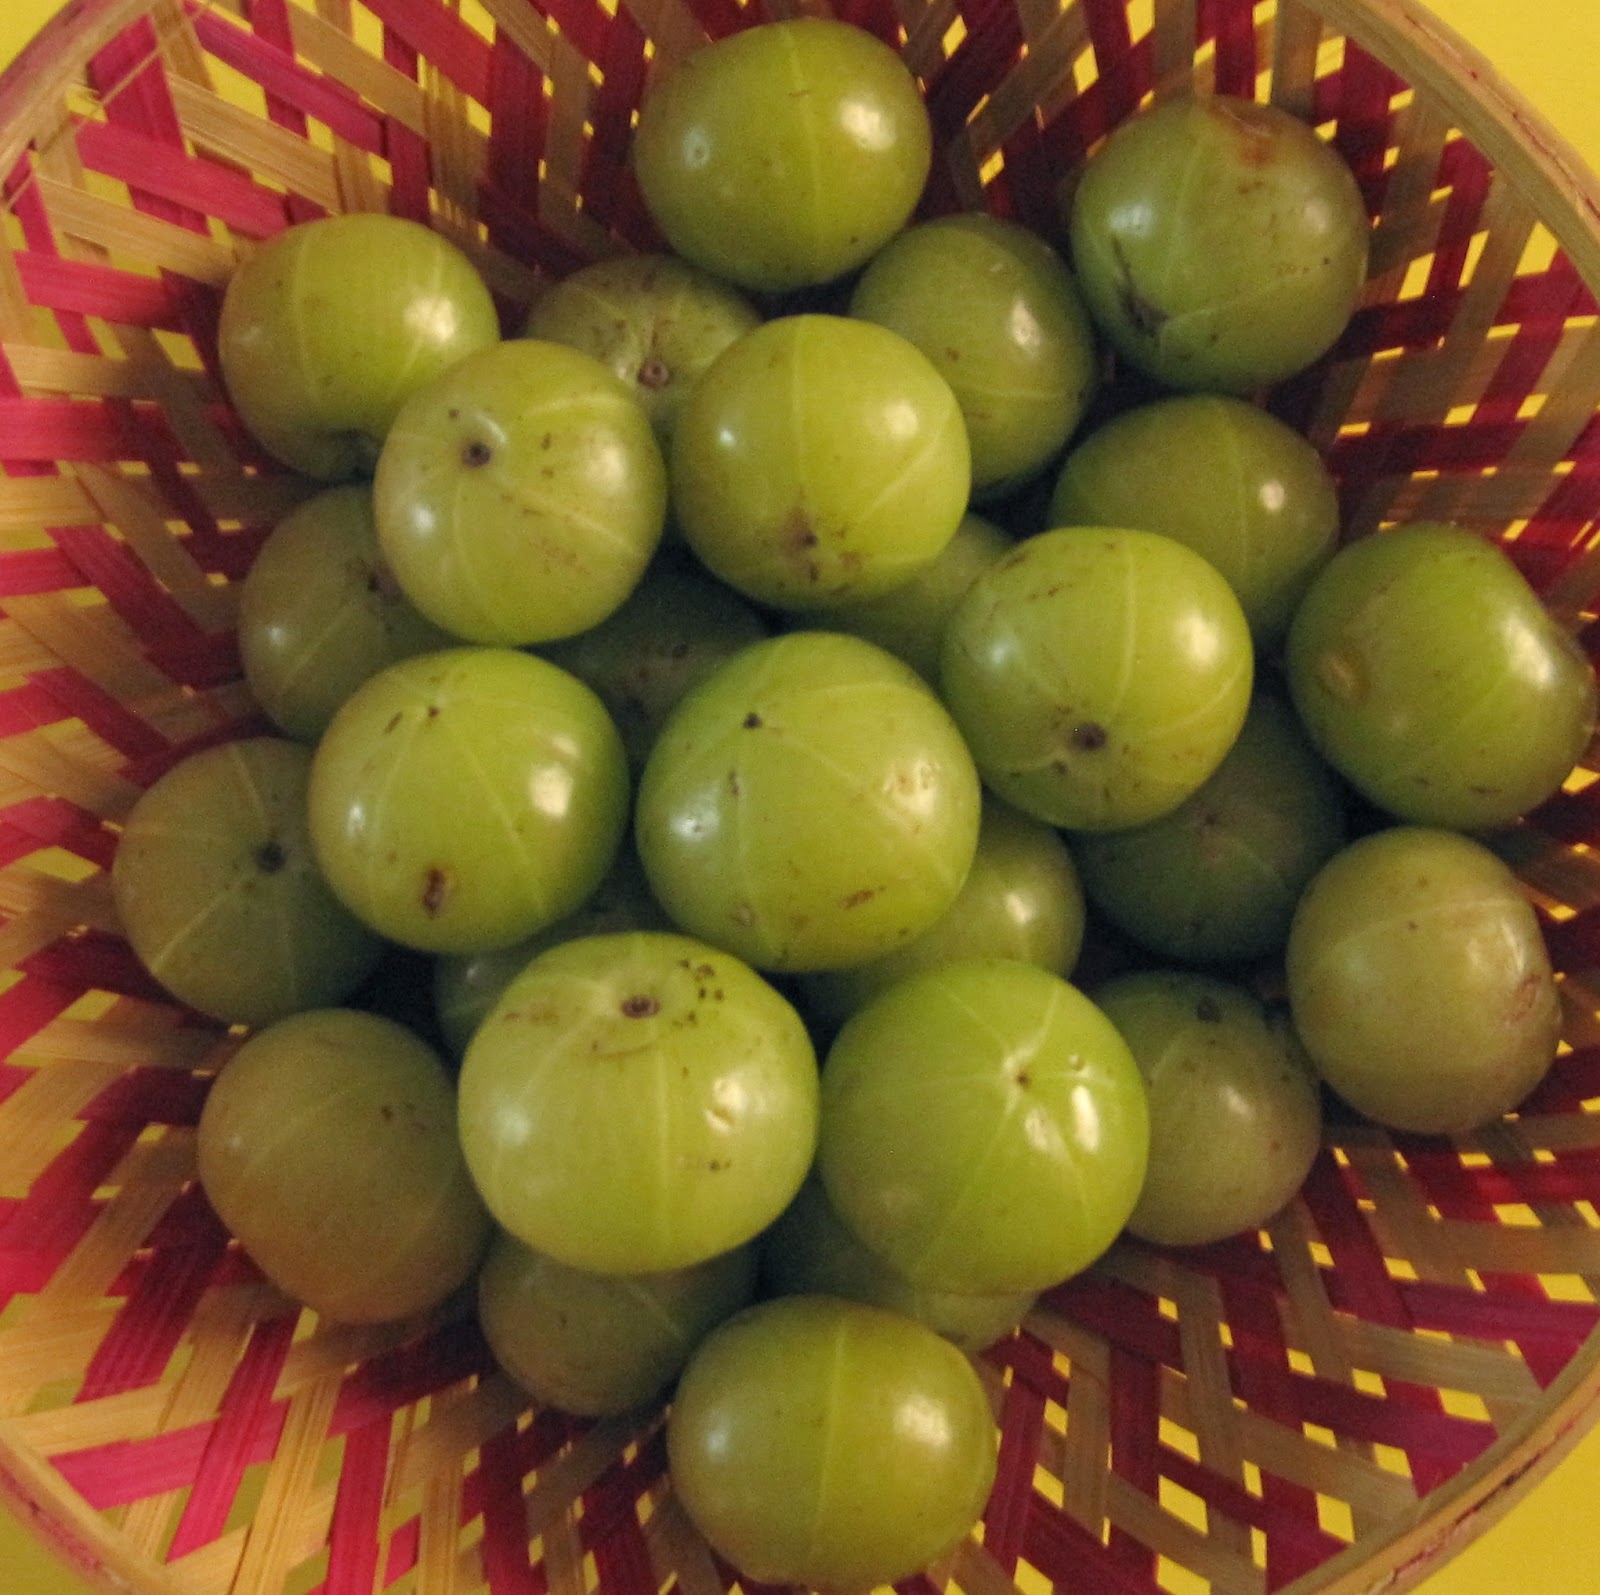
Usirikaya which is called amalika in Sanskrit, amla in Hindi, Bettada nellikkayi in Kannada, amloki in Bengali, nelli in Malayalam and Tamil, is available all over Asia. In India, the tree is considered sacred by Hindus, as they believe Vishnu dwells under this tree. Amla is a deciduous tree of the family of Phyllanthaceae. Amla is sour, bitter and astringent.

Amla is very rich in vitamin C and is known for its anti-oxidant properties. Amla fruits are low in calories and known for health-benefiting effects against cancer, aging, inflammation and neurological diseases.

When the fruits are in season, some varieties of pickles/chutneys are prepared and kept for the whole year. I am giving a few recipes for pickle/chutney etc. Recipe given below is only for temporary use. When refrigerated, the chutney stays for about 2 to 3 weeks.


Amla fruits on the tree:


: Amla washed and kept ready


Amla after microwaving:


Ingredients:

  •      5 or 6 usiri kayalu (amla/Indian gooseberry)
  •      2 or 3 green chiles
  •      Salt to taste
  •      2 tbsp. cut dhania (cilantro)
  •      1 tsp. methi mustard powder
  •      2 tsp. lemon juice

Directions:

  1.      Wash and clean usiri kayalu.
  2.      Place them in a microwave safe bowl, sprinkle a few drops of water and cover.
  3.      Microwave for 1 to 2 minutes on medium heat.
  4.      Open the segments of the amla and discard the seeds.
  5.      Add green chiles, cilantro, methi mustard powder and salt.
  6.      Transfer to a processer and grind for a few minutes.
  7.      Add lemon juice and mix it well.
  8.      The chutney keeps for 2 to 3 weeks, if refrigerated.