Showing posts with label healthy food. Show all posts

Friday, 12 January 2018

Aratikaya nuvvupodi kura (Plantain/green banana subzi with sesame powder topping)

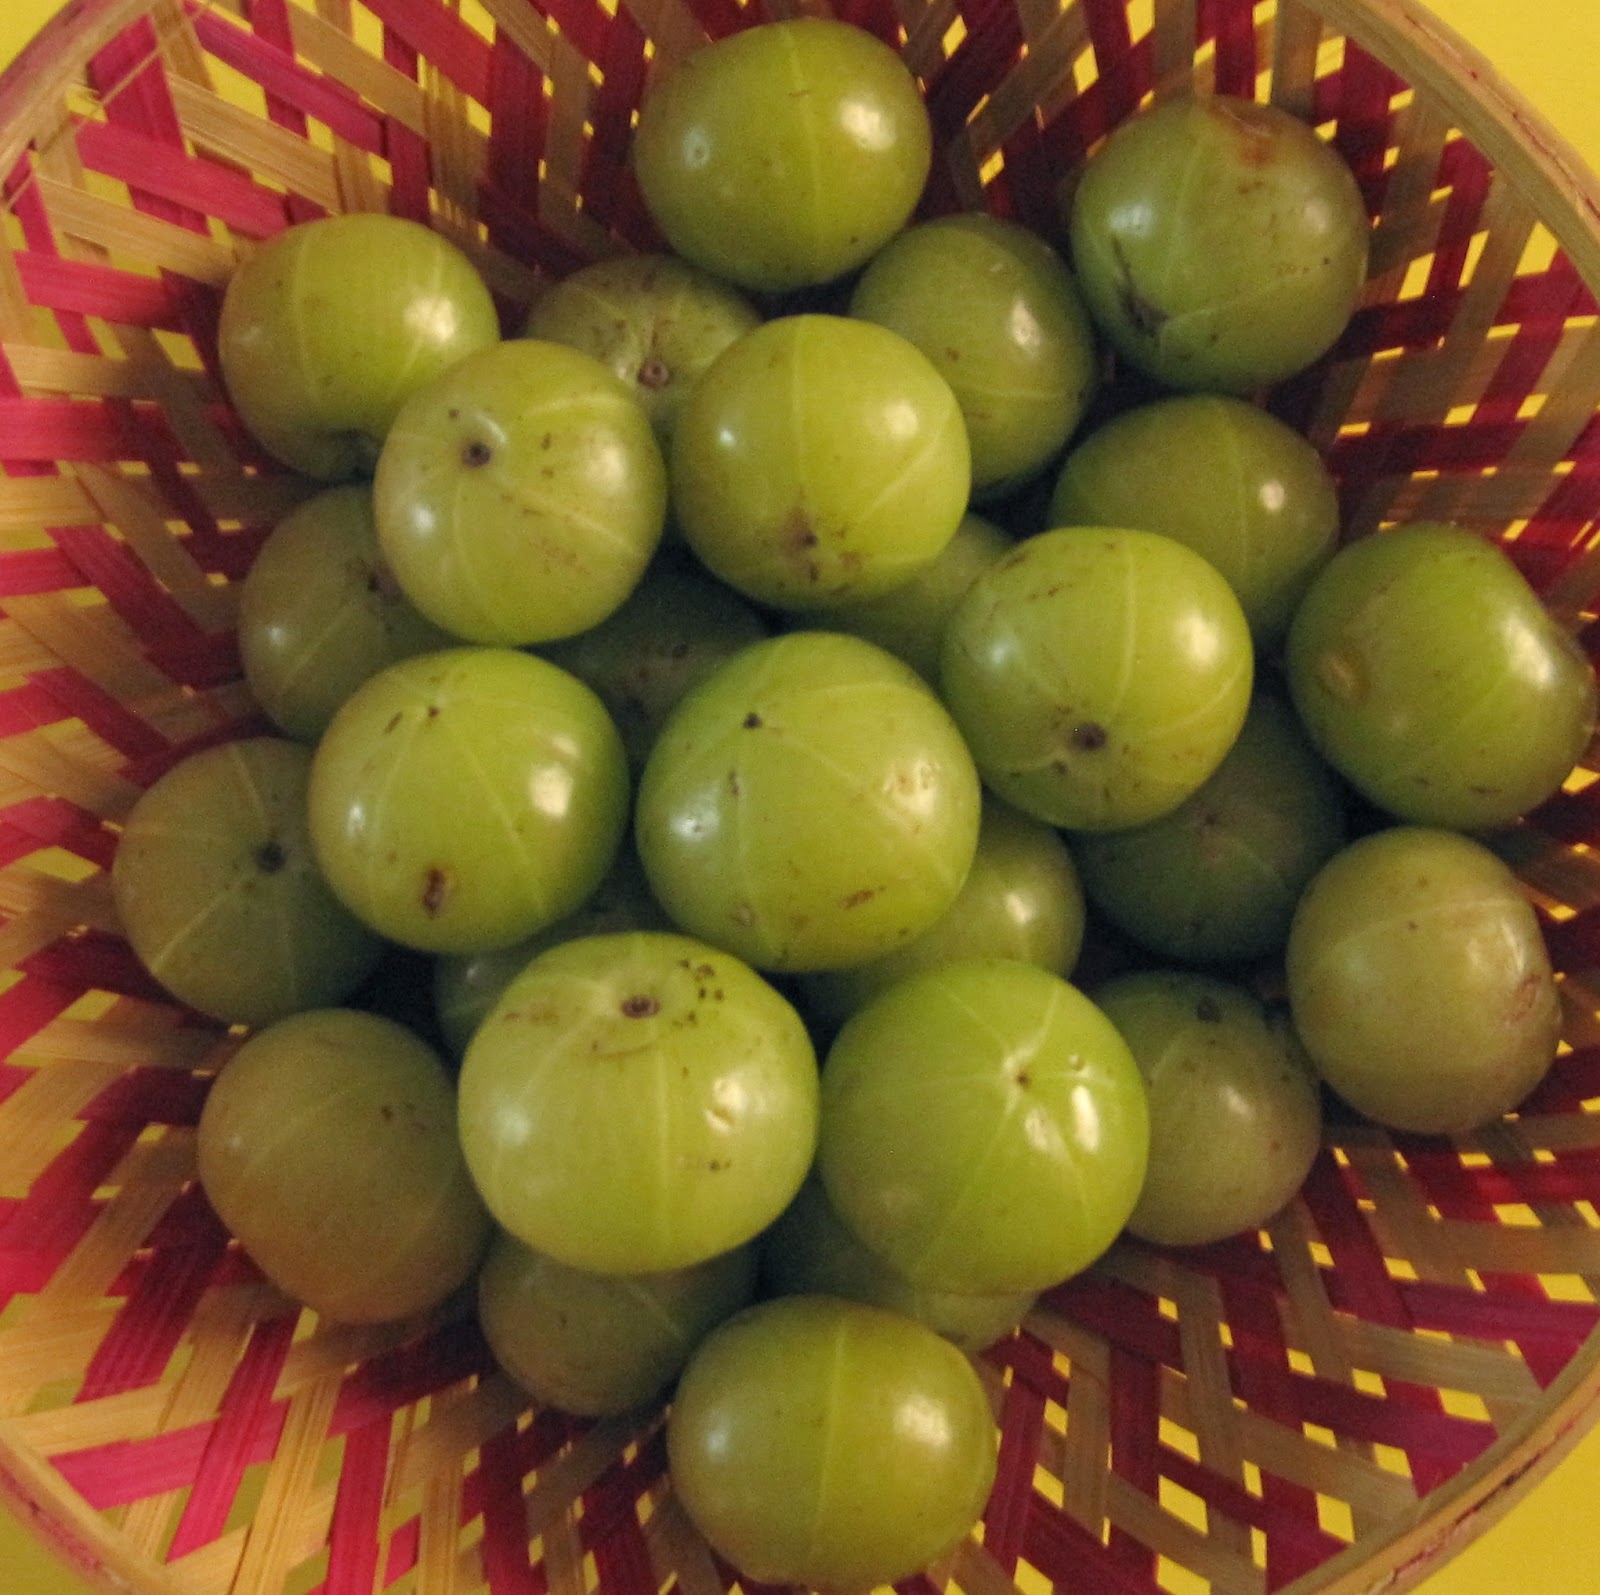
Raw green bananas or plantains are commonly grown in the tropical regions of Southeast Asia and Oceania, including the Malay Archipelago (modern Indonesia, Brunei and the Philippines) and Northern Australia. They are staple food in these regions. Green bananas have a neutral flavor and texture when the unripe fruit is cooked by steaming, boiling or frying.

An average plantain has about 220 calories and is a good source of potassium and dietary fiber.

Green bananas like their yellow counterpart, are a storehouse of health benefits. A variety of recipes using the green bananas are there. Green bananas are very commonly used in treating diarrhea. They are a popular diabetic diet.


Ingredients:
  •      2 plantains (raw bananas)
  •      1/2 Tsp. turmeric powder
  •      2 Tsp. tamarind paste
  •      Salt to taste
  •      A few curry leaves
Seasoning:
  •      2 Tsp. sesame seeds
  •      2 Tsp. dhania seeds (coriander)
  •      2 Tsp. chana dal
  •      1/2 Tsp, hing (asafetida)
  •      2  red chiles
  •      1 Tsp. mustard seeds
  •      1 Tsp. jeera seeds
  •      3 Tsp. oil
Directions:
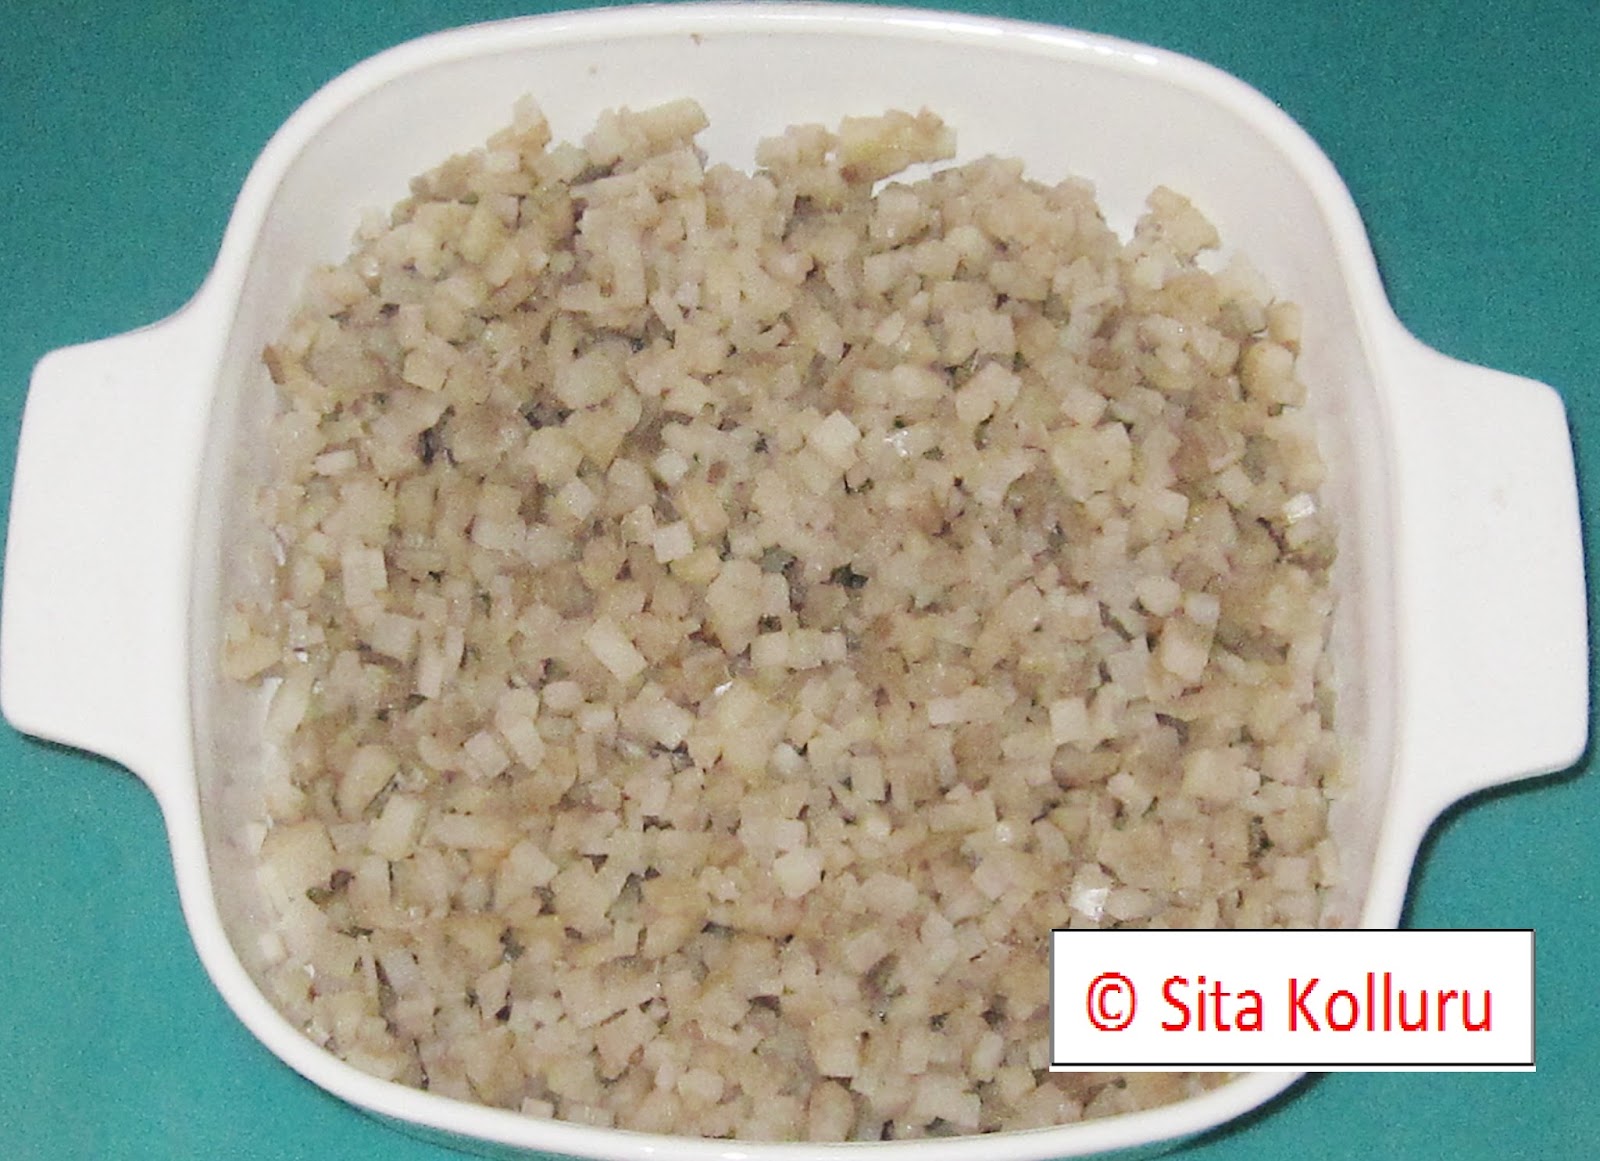
  1.     Wash and peel bananas. (Apply a spoon of oil to your palms, before peeling or dicing bananas).
  2.      Dice them in to medium size cubes.
  3.      Heat a thick pan.
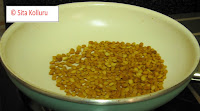
  4.      Add sesame seeds and roast without adding oil.
  5.      After roasting for 2 or 3 minutes, add hing.
  6.      Turn the heat off.
  7.      Transfer to a plate.
  8.      Similarly, roast chana dal and coriander seeds and transfer to the plate.
  9.      Grind the roasted seeds in to a coarse powder.
  10.      Add the banana pieces, turmeric powder and tamarind paste to boiling water.
  11.      When the pieces are cooked and soft to touch, remove from heat and strain.
  12.      Set aside.
  13.      Heat oil in a thick pan. 
  14.      Add red chiles, mustard seeds and jeera.
  15.      When mustard seeds crackle, add hing.
  16.      Add curry leaves.
  17.      After cooking for a minute, add the cooked banana pieces.
  18.      Add salt and stir well.
  19.      Add the ground powder. 
  20.      Mix well.
  21.      Cover and cook on low heat for 3 to 4 minutes.
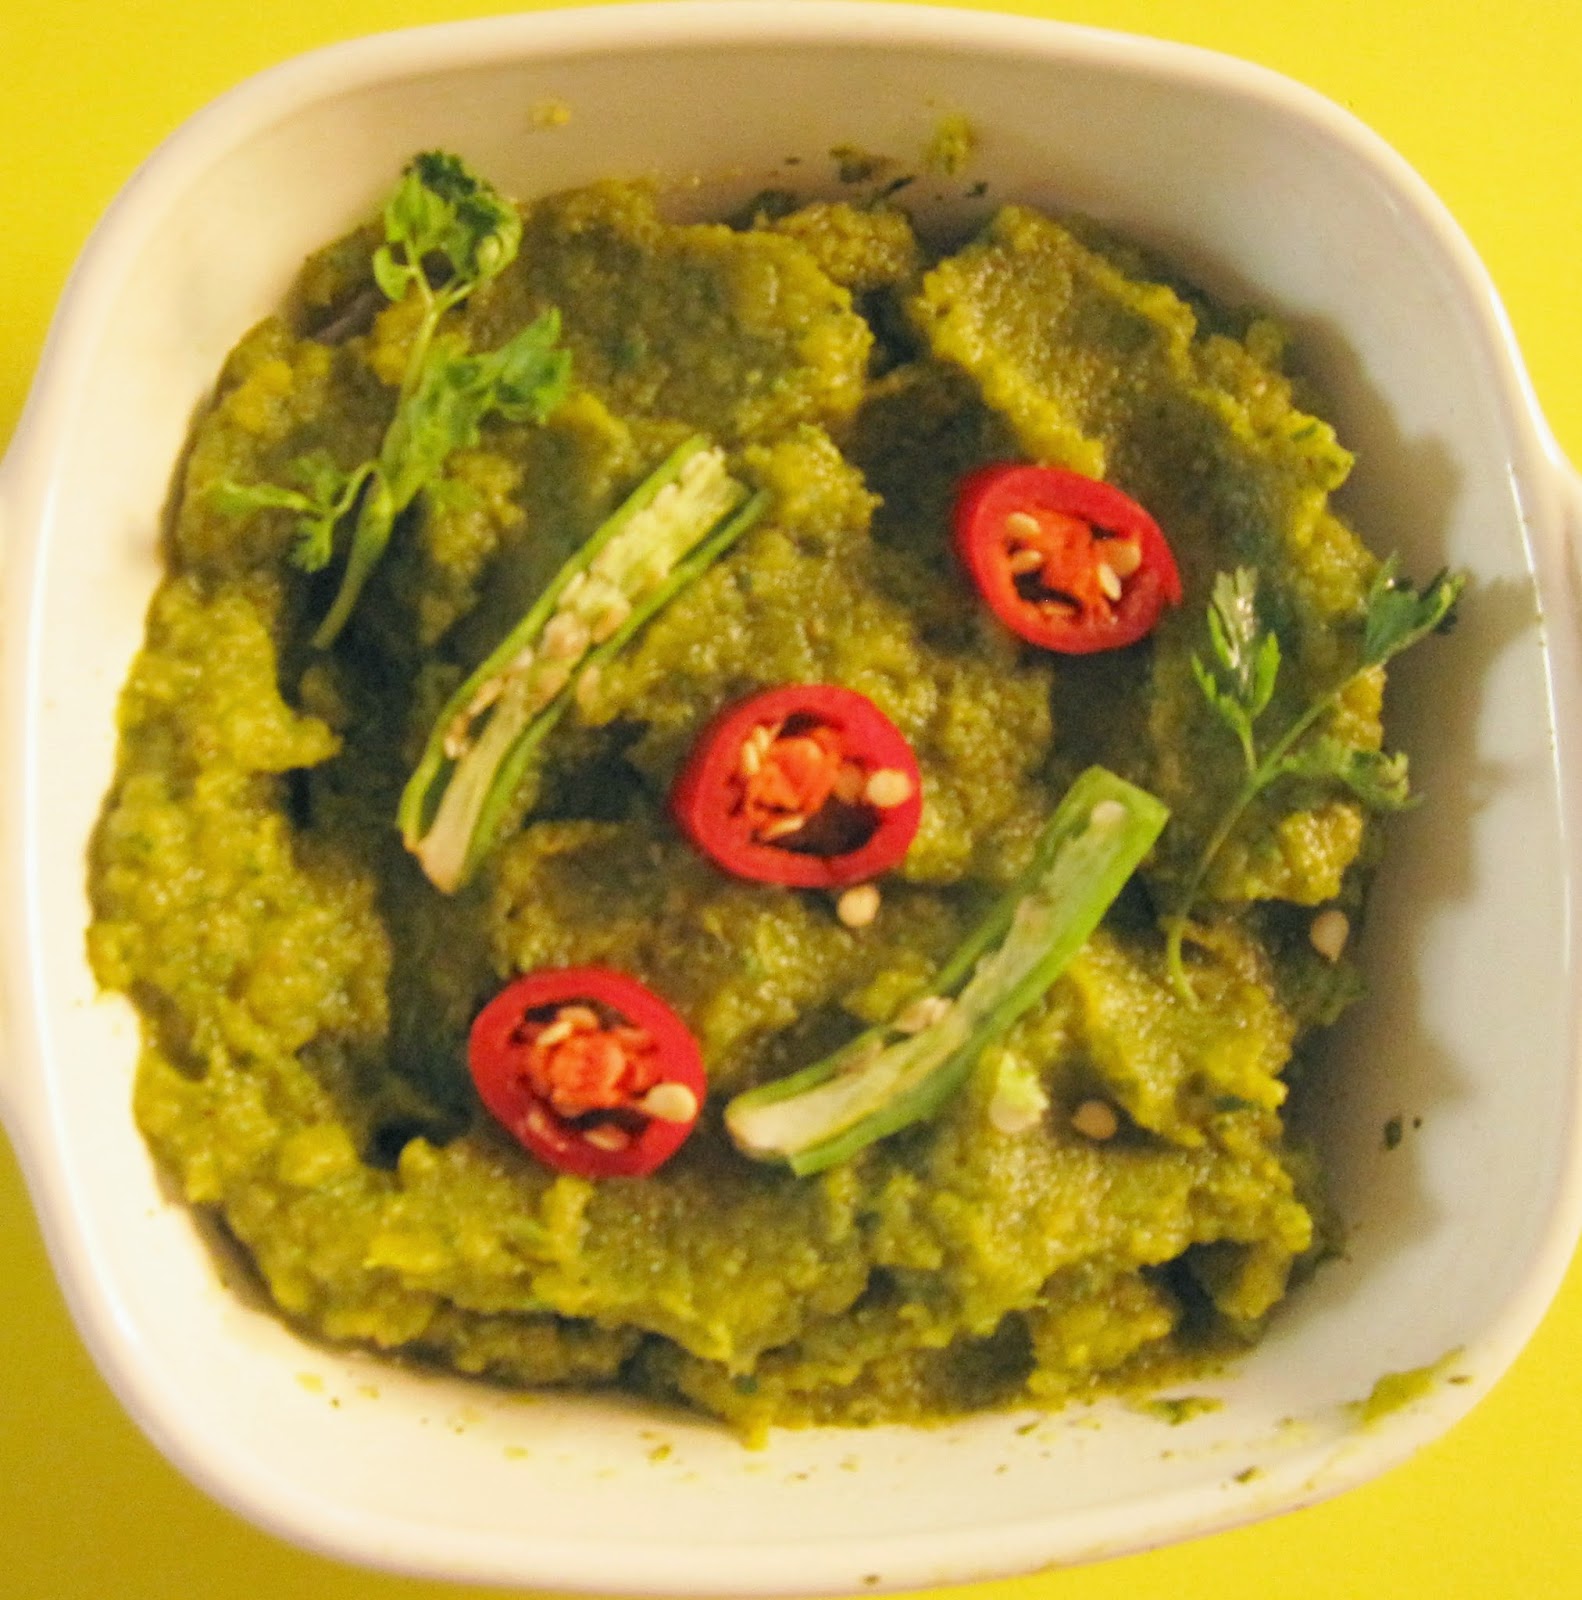
  22.      Transfer to serving dish and garnish.


Friday, 23 September 2016

Vaamu aku perugu pacchadi/Ajwain patta raita

Vaamu aku/ajwain leaf is an herb. It is also known as Bishop's weed. The leaves are tender, fleshy with a specific aroma like an oregano or thyme. The plant is native to India and East Asia.

Ajwain leaves like ajwain seeds have many medicinal properties.

For infants and children, the leaves are used for treating colds, coughs and fevers. They are ideal to relieve colic symptoms in babies.

Ajwain leaves are used in preventing and treating stomach disorders like flatulence, indigestion, and acid reflux. They also possess muscle-relaxant action, bactericidal and fungicidal properties.

Over all, ajwain leaves and seeds increase the efficiency of your body system!

The plant can be easily grown by propagating cuttings from original plant. Ajwain leaves are thick, slightly hairy and very beautiful and attractive in rounded shapes.  As they are grown in bunches and look similar to money they are supposed to be very lucky in feng shui!

Unfortunately ajwain leaves are not available in any markets. You have to grow them yourself. In USA, during cooler season, the plant has to be kept inside the house in a warm window.
 
The leaves are used in Indian cooking. Ajwain leaf bajjis (fritters) are very popular in many parts of India. I am giving a recipe for making nutritious and yummy raita/yogurt based. It is more like a salad as the leaves are not cooked and the dish is more like a dip.

Doreen Gillespie made ravioli using ajwain leaf filling, fusion cooking idea!


Ingredients:

  •      A few ajwain leaves
  •      1 cup curd (yogurt)
  •      1/2 cup sour cream (optional)
  •      2 or 3 green chiles
  •      Salt to taste

For seasoning:

  •      1 Tsp. mustard seeds
  •      1 Tsp. jeera seeds
  •      Pinch hing
  •      Cilantro for garnish

Directions:

  1.      Wash and clean ajwain leaves.
  2.      Cut them into thin long pieces.
  3.      Chop green chiles.
  4.      Whip curd without adding water.
  5.      Add ajwain leaf pieces.
  6.      Add salt.
  7.      Add sour cream.
  8.      Mix well.
  9.      Heat oil in a small pan.
  10.      Add mustard and jeera seeds.
  11.      When mustard seeds splutter, add hing.
  12.      Add green chiles.
  13.      Add the seasoning to raita.
  14.      Mix well and garnish with cilantro.


Friday, 19 August 2016

Kadhi pakoda (majjiga pulusu with pakodi)/ chickpea flour fritters in buttermilk gravy

Sometime back, I have posted a recipe for majjiga pulusu (buttermilk pulusu). Majjiga pulusu where many vegetables are cooked in buttermilk, is a popular side dish in South India. The North Indian version of the same is Kadhi pakoda. In this dish, instead of vegetables, small pakodas (deep fried chickpea flour fritters) are cooked in buttermilk gravy.

There are different recipes for making kadhi pakoda from different regions of India like Punjabi kadhi, Gujarati kadhi, UP kadhi etc.

You need to have sour buttermilk or yogurt to make this dish. If using yogurt, add some water and whip it so that you get buttermilk. Thickness of the gravy, is according to your taste. If you more flowing gravy, you may add more water while cooking.

Kadhi pakoda served along with hot steamed rice makes such a nostalgic dish. Serve it along with some crunchy papads and it is going to be a hit!

As I am trying to reduce deep fried cooking, I used the gunta pongaralu/paniyaram chetti or Aebleskiver pan to make the pakodas. This version of kadhi pakoda was tasted by many of my guests and found as good as the deep fried version (if not better!)!

Go ahead and try it out!


Ingredients:

For pakodas:

  •      1 cup besan (chickpea flour)
  •      2 Tbsp. rice flour
  •      1 or 2 green chilis  (finely chopped)
  •      1/2 inch ginger (finely chopped)
  •      2 Tbsp. onion (finely  chopped)
  •      1/2 Tsp. baking soda
  •      Salt to taste
  •      4 Tbsp. oil

For kadhi:

  •      2 cups or more buttermilk
  •      2 Tbsp. besan
  •      1 Tsp. chili powder
  •      1 Tsp. dhania powder (coriander powder)
  •      1/2 Tsp. jeera powder
  •      1/2 Tsp. garam masala

For seasoning:

  •      1 or 2 red chilis
  •      1 Tsp. methi seeds
  •      1 Tsp. ajwain
  •      1Tsp. mustard seeds
  •      Pinch of hing (asafetida)
  •      Curry leaves
  •      Cilantro for garnish

Directions:

Making pakodas:

  1.      Mix besan, rice flour, salt and baking soda in a bowl.
  2.      Add green chili, ginger and onion pieces.
  3.      Add a little water and mix thoroughly to make the batter. Not too watery and just enough to drop as pakodas.
  4.      Clean and heat the gunta pongaralu/paniyaram chetti or Aebleskiver pan.
  5.      Add a drop of oil and brush around.
  6.      When the pan is hot, drop a spoon of batter, add a drop of oil and cover.
  7.      Cook for a few minutes, when the pakodas are semi cooked, flip them and cook.
  8.      Check after a few minutes with a fork and if fully cooked, remove from pan and set them aside.
  9.      Repeat till most of the batter is used.

Making kadhi:

  1.      Using the same bowl, add buttermilk, and besan, chili powder, dhania powder, jeera powder and garam masala.
  2.      Mix thoroughly with a whip taking care that there are no lumps.
  3.      Heat a deep pan and add oil for seasoning.
  4.      When oil is hot, add red chili, methi seeds, mustard seeds, jeera and ajwain.
  5.      When mustard seeds flutter, add hing and curry leaves.
  6.      Pour the buttermilk mixture and keep stirring.
  7.      Let it boil for a few minutes.
  8.      Take hot water in a bowl.
  9.      Place the pakodas for a few minutes.
  10.      Squeeze the liquid out and place them in the boiling buttermilk mixture.
  11.      Add all the pakodas. Let them cook for one or two minutes. If cooked too long, pakodas break. So see that they are not overcooked.
  12.      Remove from heat, add salt and mix it well.
  13.      Transfer to a serving dish, garnish with cilantro.
  14.      It is a popular side dish for rice or kichadi. 


Tuesday, 5 July 2016

Arati doota/davva kura (Banana stem subzi)

The tender nutritious stem of banana plant is called arati doota or arati davva in Telugu, vazhaithandu in Tamil and thor in Bengali. In many parts of India, arati doota is eaten in subzis, raitas and kootu etc.

Once a bunch of bananas is harvested, the tree is cut away. Outer layers of the stem are peeled away, till you get the tender inner stem. This stem is edible and has a lot of medicinal value. Removing the outer layers of the stem is a labor intensive process. First, we have to cut the stem into circular discs. While cutting the discs, we have to take out the extra fiber, by taking it on to the right index finger and make circular movement of the finger, while holding the fiber. Repeat this process with the entire stem. Pile some of the discs together and chop them into small cubes. The chopped cubes have to be kept in diluted buttermilk. Otherwise, the pieces are decolorized. I included quite a few photographs of the cutting process.

Arati doota is very good for health. It is low in calories and rich in fiber. It is good for kidneys, keeps blood pressure under control. It is good for kidney stones. It is very beneficial for people who want to lose weight!

I am giving directions to make arati doota ava kura (banana stem subzi with mustard paste), which is a very popular dish in Coastal Andhra Pradesh.


Ingredients:

  •      2 cups Arati doota, finely chopped
  •      Salt to taste
  •      3 Tsp. lemon juice or
  •      2 Tsp. tamarind paste
  •      3 Tsp. mustard paste or powder

For seasoning:

  •      2 Tsp. chana dal
  •      1 Tsp. urad dal
  •      1 Tsp. mustard seeds
  •      Pinch of hing (asafetida)
  •      2 or 3 green chiles, chopped
  •      1 Tsp. ginger, chopped
  •      A few curry  leave

Directions:
  1.      Chop the doota into small pieces. The chopped doota has to be soaked in buttermilk added to plenty of water, otherwise the pieces decolorize when they are left outside.
  2.      After the doota is ready, boil some water in a deep pan and add the drained chopped doota.
  3.      Add turmeric and let it cook till the doota is soft to touch.
  4.      Drain the water and set aside the cooked doota.
  5.      Heat a pan and add oil.
  6.      Add chana dal to the hot oil.
  7.      When the dal is turning golden in color, add urad dal and mustard seeds.
  8.      Add hing, green chiles and ginger.
  9.      Add curry leaves.
  10.      Add the cooked doota and keep stirring.
  11.      If using tamarind paste, add it now.
  12.      Add salt.
  13.      Mix well and let it cook for 5 to 10 minutes.
  14.      Remove from heat and add lemon juice and mustard paste.
  15.      Serve with rice.


Thursday, 17 September 2015

Sandita kothimira karam kura (sandita cooked with cilantro)

In my experiments to cook different dishes with sandita, I tried my favorite masala, cilantro. As you might have noticed, I use this masala for a variety of vegetables, like dondakaya/ parval/ eggplant etc. It comes in handy, to grind cilantro with green chile and keep the paste in refrigerator and use it during the week.


Ingredients:

  •      2 cups sandita
  •      1 cup cut cilantro
  •      1 or 2 green chiles
  •      Salt to taste
  •      3 to 4 Tsp. oil

Directions:

  1.      Clean cilantro, grind to a paste adding green chiles
  2.      Either cut sandita in half or just make a slit half way through.
  3.      Microwave for 3 minutes on medium heat.
  4.      Add oil to a thick pan, add sandita.
  5.      Stir sandita and add cilantro paste.
  6.      Add a few spoons of water.
  7.      Cover and cook on low heat for 5 to 8 minutes, till sandita are soft.
  8.      Serve with rice or chapatti. 

Monday, 10 August 2015

Thotakura pulusu (Chaulai saag/Amaranth pulusu)

Thotakura is a very popular leafy vegetable available all over India and in many countries. Some small leaf varieties are easily available in India. Amaranth is available in large sized red and green colored species also. In USA, the red and green color varieties are available in farmers' markets and other Asian stores.

In Uttar Pradesh and Bihar, it is called Chaulai, in Karnataka Harive, in Kerala Cheera, in Tamil Nadu Keerai, in Orissa Khada Saga and in Maharashtra it is called Shravani Maath. Many local recipes are available in different parts of India.

Cooked Amaranth leaves are a good source of Vitamin A, Vitamin C and folate. They are a complementing source of many dietary minerals also. Cooked leaves are a good source of fiber. Many families are now including leafy vegetables in their daily menus.

In Andhra Pradesh, thotakura pappu (Amaranth dal) and thotakura pulusu are usually prepared. Recipes are available for dry thotakura subzi also. I am giving a recipe for making pulusu, cooking amaranth along with tamarind juice and other seasonings. It can be served with rice or roti.

In USA, large bunches of amaranth are available, whereas, in India, smaller bunches of small leaf thotakura are available. Pictures of both are inserted.

If green mangoes or tender tamarind are available, tamarind juice can be replaced with appropriate amount of green mango or tender tamarind. You may try replacing tamarind by rhubarb also!


Amaranth available in USA:                                                         Thotakura from Andhra Pradesh


Ingredients:

  •      2 to 3 Tbsp. onion chopped
  •      1 large bunch of thotakura (Amaranth)
  •      2 to 3 green chiles
  •      2 Tbsp. tamarind paste
  •      1/2 tsp. turmeric powder
  •      Pinch of hing (Asafetida)
  •      Salt to taste
  •      2 to 3 Tbsp. rice flour (as needed)

Seasoning:

  •      2 red chiles
  •      1 tsp. methi seeds
  •      1 tsp. mustard seeds
  •      1 tsp. jeera seeds
  •      Pinch of hing (Asafetida)
  •      4 or 5 pods  garlic (Optional)

Directions:

  1.      Clean and cut thotakura into 1/2 inch pieces.
  2.      Put onion pieces and thotakura in a deep pan.
  3.      Add enough water to cook, maybe just to cover the greens.
  4.      Cook till thotakura is tender.
  5.      Add green chile, tamarind, turmeric powder, hing and salt.
  6.      Keep cooking for 10 minutes.
  7.      Mix rice powder in a little water to make a paste.
  8.      Add gradually to the pulusu.
  9.      Keep stirring so that the rice paste gets mixed and is not lumpy.
  10.      Add enough rice flour to get the thickness you like.
  11.      Keep stirring and cook for 2 to 3 minutes.
  12.      Heat oil in a separate pan and add red chiles.
  13.      After a minute, add methi, jeera and mustard seeds.
  14.      Add hing and add to the pulusu.
  15.      Cover and turn off the heat.
  16.      If you like, fry garlic pods in oil and add as topping.

Note: I add more rice flour to make thick pulusu. Some people like to make slightly watery pulusu. Depending on the consistency you like, adjust the amount of rice flour. In place of rice flour, you may use besan (chickpea flour) also.


Saturday, 6 June 2015

Kheera perugu pacchadi (Kheera raita) Cucumber in yogurt

During summer time, even looking at kheera (cucumber) slices, quenches the thirst! Cucumber is very cooling and soothing during hot months. There are a lot of beauty tips using cucumber!

Cucumber raita is easy to prepare and is an uncooked food, except for seasoning!  Refrigerated raita is very soothing.


Ingredients:

  •      2 large or 3 or 4 small cucumbers
  •      1 1/2 cups yogurt
  •      Salt to taste
  •      2 green chiles
  •      1 inch ginger (chopped fine)
  •      1 Tsp. mustard seeds
  •      1 Tsp. jeera seeds
  •      1 Tsp. oil
  •      A pinch of hing (Asafetida)
  •      A few curry leaves
  •      Cilantro for garnish


Directions:

  1.      Peel and grate cucumber.
  2.      Beat curd without adding water.
  3.      Squeeze fluid out of grated cucumber (optional) and add it to curd.
  4.      Add salt.
  5.      Mix well.
  6.      Heat oil and add mustard and jeera seeds.
  7.      When mustard seeds splutter, add hing.
  8.      Add green chile and ginger. Cook for a minute.
  9.      Add curry leaves.
  10.      Add seasoning to curd mixture.
  11.      Garnish with cilantro and let it cool.
  12.      Serve it after refrigerated.

Nice side dish for pulihora or parathas.

Friday, 22 May 2015

Papaya salad


Papaya is native to the tropics and easily available in the tropics of Americas, Central America, Mexico and is widely grown in India, Australia, the Philippines, Hawaii etc.

Ripe papaya is usually eaten raw without skin or seeds.  Papaya fruit is a significant source of vitamin C and folate.  Papayas have a high amount of pectin.
In traditional medicine, it is believed that papaya can raise the platelet levels and so papaya is used as a medicine in Dengue fever. Papaya leaves are believed to be useful in treatment of malaria.
The unripe green fruit can be eaten cooked in many subzis and stews. In Thai cuisine, Green papaya salad is very popular. Som tam, the Thai variation was listed in World's 50 most delicious foods compiled by CNN in 2011!
 Salad without peanut powder:


Salad with peanut powder:


Ingredients:

  •      2  Cups Green Papaya (Grated)
  •      1  Capsicum (Grated)
  •      1  Tomato (Grated)
  •      1 or 2 green chiles (Finely chopped)
  •      3 Tbsp. roasted peanuts (Coarsely powdered) (Optional)
  •      Salt to taste
  •      2 Tsp. lemon juice
  •      1 Tbsp. oil
  •      Cilantro for garnish

Directions:

  1.      Peel and grate green papaya.
  2.      Grate or finely chop capsicum.
  3.      Grate or finely chop tomato
  4.      Finely chop green chile.
  5.      Mix all the ingredients in a bowl.
  6.      Add salt and lemon juice.
  7.      Add oil and mix well. 
  8.      Sprinkle peanut powder and mix well.
  9.      Chill for an hour and serve.


Wednesday, 15 April 2015

Sorakaya/lauki pappu kura (bottle gourd with moong dal subzi)


Sorakaya/aanapakaya/lauki/doodhi/ghiya/bottle gourd is available all over India. It is easily digestible and light on the stomach. Boiled lauki is served to babies and also persons convalescing after illness. It is high in certain minerals and vitamins. It is beneficial for diabetics and people suffering from high blood pressure!

As it is, lauki has a bland taste and children do not like it easily. To make it tastier and also more nutritious, you can add either dals (moong/chana etc) or garnish with groundnut powder/sesame powder etc. I am giving a recipe where lauki is cooked along with moong dal.

I normally use microwave to reduce the  cooking time. I am giving directions for both stove top method and microwave cooking.


Sabzi made using both the methods. Left half is microwave cooked.
Right half is stove top cooked.


Ingredients:

  •      3 cups sorakaya /lauki pieces
  •      1 cup moog dal
  •      Salt to taste
  •     A few curry  leaves

Seasoning:

  •      2 red chiles
  •      1/2  tsp. mustard seeds
  •      1/2 tsp. jeera seeds
  •      A pinch of hing (asafetida)
  •      2 tsp. oil
Directions:
Stovetop cooking:
  1.      Wash, peel and cut lauki into small cubes.
  2.      Soak moong dal in water for about an hour.
  3.      Heat pressure cooker and add oil.
  4.      When the oil is hot, add red chile, mustard and jeera seeds.
  5.      When mustard seeds splutter, add hing and curry leaves.
  6.      Add lauki pieces.
  7.      Mix it well.
  8.      Drain moong dal and add it to the  lauki pieces.
  9.      Sprinkle a little water, add salt and mix it well.
  10.      Cover and let it cook for one whistle.
  11.      Open the cooker when pressure is normal.
  12.      Cook on low heat till the extra water evaporates.
  13.      When moong dal and lauki pieces are cooked, turn the heat off.
  14.      Leave it covered for five minutes and serve.

Microwave cooking:

  1.      Place the lauki pieces and moong dal in a microwave safe bowl.
  2.      Add a little water.
  3.      Cover and cook on medium heat for 3 to 4 minutes.
  4.      Check whether lauki pieces and moong dal are partially cooked.
  5.      Heat oil in a thick deep pan.
  6.      Add chile pieces, mustard and jeera seeds.
  7.      When mustard seeds splutter, add hing and curry leaves.
  8.      Add lauki dal mixture.
  9.      Add salt and stir well.
  10.      Lower heat and cook covered for 3 to 4 minutes, till the liquid evaporates.
  11.      Turn heat off and leave it covered for a few minutes and serve.


Saturday, 28 February 2015

Moongdal salad

Usually salad is not an integral part of South Indian cooking. Mostly, either some slices of onion, cucumber or long green chiles are served along with meals.

Soaked drained uncooked moong dal or chana are offered to gods as prasadam. So, the lentils are converted into salads or seasoned with some salt and chile etc and served as snacks. Moong dal salad, popularly known as Kosumbari in Karnataka is very easy to make and very nutritious healthy food. Sprouted moong or sprouted chana can be used in place of or along with moong dal. If chana dal is used, it is better to cook in pressure cooker before adding.

Vegetables like grated carrots, grated or chopped cucumber, finely cut onions, grated fresh coconut, fresh pomegranate, and grapes can be added. Even finely chopped and cooked cabbage can be added to the salad.

As summer is approaching, the fresh salad is a welcome snack.


Ingredients:

  •      1/2 cup moong dal split either with or without skin
  •      1 green chili finely minced
  •      1 or 2 carrots cut finely or grated
  •      1 small cucumber finely cut
  •      2 or 3 tsp. fresh grated coconut
  •      2 or 3 tsp. finely chopped cilantro
  •      2 tsp. lemon juice
  •      Salt to taste

Seasoning: (optional)

  •      1 tsp. oil
  •      1/2 tsp. mustard seeds
  •      1/2 tsp. jeera seeds
  •      Pinch of hing (asafetida)

Directions:

  1.      Soak moong dal for 1 or 2 hours
  2.      Wash and drain completely.
  3.      Mix all ingredients.
  4.      Fry seasoning and mix thoroughly.
  5.      Let it settle for a few minutes and serve.


Wednesday, 11 February 2015

Usirikaya pacchadi (amla/Indian gooseberry chutney)


Usirikaya which is called amalika in Sanskrit, amla in Hindi, Bettada nellikkayi in Kannada, amloki in Bengali, nelli in Malayalam and Tamil, is available all over Asia. In India, the tree is considered sacred by Hindus, as they believe Vishnu dwells under this tree. Amla is a deciduous tree of the family of Phyllanthaceae. Amla is sour, bitter and astringent.

Amla is very rich in vitamin C and is known for its anti-oxidant properties. Amla fruits are low in calories and known for health-benefiting effects against cancer, aging, inflammation and neurological diseases.

When the fruits are in season, some varieties of pickles/chutneys are prepared and kept for the whole year. I am giving a few recipes for pickle/chutney etc. Recipe given below is only for temporary use. When refrigerated, the chutney stays for about 2 to 3 weeks.


Amla fruits on the tree:


: Amla washed and kept ready


Amla after microwaving:


Ingredients:

  •      5 or 6 usiri kayalu (amla/Indian gooseberry)
  •      2 or 3 green chiles
  •      Salt to taste
  •      2 tbsp. cut dhania (cilantro)
  •      1 tsp. methi mustard powder
  •      2 tsp. lemon juice

Directions:

  1.      Wash and clean usiri kayalu.
  2.      Place them in a microwave safe bowl, sprinkle a few drops of water and cover.
  3.      Microwave for 1 to 2 minutes on medium heat.
  4.      Open the segments of the amla and discard the seeds.
  5.      Add green chiles, cilantro, methi mustard powder and salt.
  6.      Transfer to a processer and grind for a few minutes.
  7.      Add lemon juice and mix it well.
  8.      The chutney keeps for 2 to 3 weeks, if refrigerated.